
Introduction: Why Clean Kitchen Exhaust Hood Filters Matters in Somerville, New Jersey
Clean kitchen exhaust hood filters are essential for safety, air quality, and equipment performance in any cooking space, whether you are managing a high-volume restaurant on Main Street or running a busy community kitchen near downtown Somerville. Grease-laden vapors accumulate quickly, and if filters are neglected, that buildup can restrict airflow, strain fans and motors, and create a fire hazard. Establishing a thoughtful cleaning routine helps your kitchen stay compliant with standards often informed by NFPA 96, contributes to better indoor air, and protects your staff and guests. If you prefer to outsource the toughest tasks or need expert verification of your results, consider professional kitchen exhaust hood cleaning to supplement your in-house efforts.
This guide explains what filters do, how to prepare for cleaning, the safest step-by-step process, how to avoid damaging finishes or voiding warranties, and what to document after each cycle. While the process is straightforward, attention to detail makes the difference between a surface-level rinse and a thorough reset that restores clean airflow. By following the methods below, your team can keep filters in top condition and support a healthier, more efficient kitchen year-round in Somerville’s changing seasons.
Understanding Your Hood Filters and Airflow
Most commercial and semi-commercial kitchens in Somerville use baffle-style stainless-steel filters. These units allow air to pass while forcing grease droplets to change direction and collect on metal surfaces, reducing the risk that hot grease vapors will migrate into the duct. Mesh-style filters are less common in commercial settings because they clog more easily; however, they may appear in light-duty applications. The goal of cleaning is to remove trapped grease without bending the metal, eroding protective finishes, or leaving residues that redeposit as soon as the hood is back in service. Clean filters mean less resistance, steadier capture velocity at the hood opening, and a quieter, more reliable exhaust fan.
You can quickly gauge when cleaning is due by observing airflow, odor, and visible residue. If the hood seems louder than usual, smoke lingers longer, or you notice sticky films around the canopy, it is time to clean. Weekly service works for many operations, but higher-volume fryers, charbroilers, or wok stations often require midweek maintenance. Logging these observations strengthens your preventive schedule and helps you plan labor during slower prep windows.
Safety First: Prepare the Space and Your Team
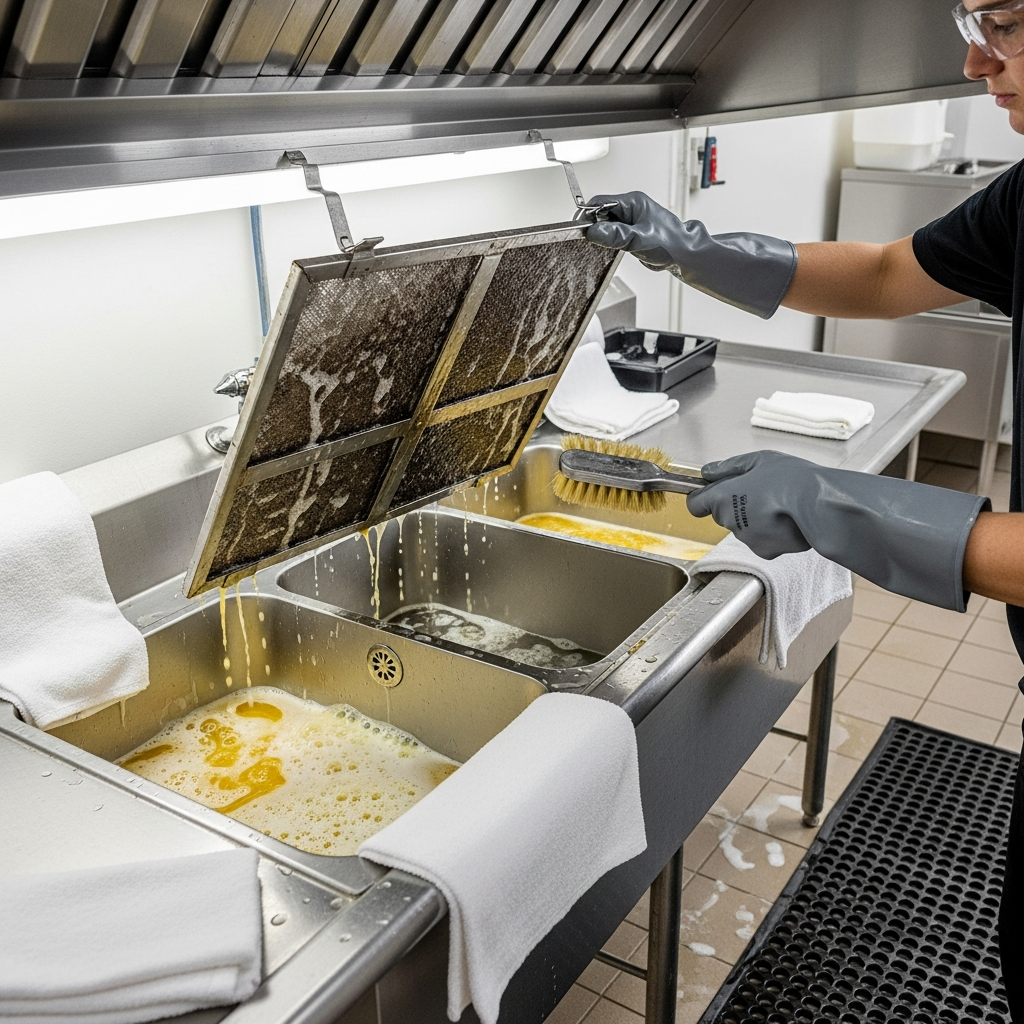
Before removing filters, address safety. Power down cooking equipment and allow hot surfaces to cool to avoid burns. Put on cut-resistant gloves and eye protection since edges and corners can be sharp, and splashes are possible when degreasing. Lay absorbent pads or folded towels around the sink area to catch drips. If you plan to soak filters in a soak tank, confirm the tank’s chemical concentration matches manufacturer guidance, and ensure proper ventilation. Never mix chemicals, and always label containers clearly. Keep a dedicated plastic or stainless-steel brush on hand for scrubbing so you do not transfer food contaminants into the cleaning zone.
Protect surrounding surfaces. Use a food-safe, non-caustic degreaser recommended for stainless steel, or a mild alkaline detergent formulated to break down fats. Strong, undiluted caustics can etch stainless steel or discolor aluminum; if your filters have aluminum components, confirm compatibility before soaking. Finally, position a drying rack or clean sheet pans with lint-free towels to support the filters after rinsing, ensuring water drains away from corners so moisture does not linger.
Step-by-Step: How to Remove and Handle Filters
Work in manageable batches to prevent congestion at the sink. Slide each filter toward you while lifting the rear edge to disengage it from the hood’s track, keeping the unit level to avoid dripping grease onto cooking equipment. Inspect each piece as you go. If fasteners or frames are loose, tag them for repair rather than returning them to service. Look for excessive warping, rattling parts, or chipped corners that can snag and scratch employees or other filters. Place heavily soiled units at the front of your queue so they spend more time soaking.
Before soaking, rinse loose debris with warm water to reduce clouding in your detergent bath. Avoid high-pressure jets that can force residue deeper into baffles or spread aerosolized grease. The goal is a gentle pre-rinse that makes the soak more effective without driving contaminants where they are harder to reach.
Degreasing and Soaking Techniques That Work
Fill a deep sink or soak tank with hot water and add your degreaser per label instructions. Hotter water typically improves performance by liquefying fats, but do not exceed temperatures that might warp frames or soften gaskets. Submerge the filters completely, ensuring each piece has space for water to circulate. Agitate the bath briefly by moving filters up and down; this helps fresh solution contact the greasiest surfaces. Soak times vary; in many cases, 10 to 20 minutes is sufficient, but stubborn residues on high-heat lines may need longer.
After soaking, scrub along the direction of the baffles using a soft or medium-bristle brush. Scrub both sides and especially the edges where grease accumulates as a sticky ring. If you encounter tar-like deposits, refresh the detergent strength or repeat the soak rather than attacking the build-up with an overly stiff brush that could scratch or deform the metal. Gentle repetition is safer and ultimately more effective than brute force.
Rinsing, Drying, and Reinstallation
Rinse thoroughly with warm water until runoff is clear and free of suds. Residual detergent can attract new soil and cause streaking, so be patient and methodical. Shake off excess water and transfer filters to your drying surface. Air-drying is best, but you can speed the process by wicking moisture with lint-free towels. Do not apply heat sources like open flames or high-temperature ovens to accelerate drying; these can distort metal and compromise fit.
Before reinstalling, wipe the hood’s track and the surrounding canopy lip, which often trap residue. Insert each filter at the same angle you removed it, lifting the rear edge to set into the track and then lowering the front into place. A good fit will feel secure, without rattling or gaps. When the set is complete, briefly test the exhaust fan to verify even airflow and listen for vibrations that might suggest a misaligned piece.
Cleaning Frequency and Scheduling in Somerville Kitchens
Frequency depends on menu, volume, and equipment type. A café that primarily bakes pastries may find a biweekly schedule adequate, while a sports bar running multiple fryers might clean filters every other day. Track conditions by station. The fryer line usually soils faster than a salad prep station near the same hood. Align cleaning with slower periods—after breakfast rush or midafternoon lull—to avoid disrupting service. In Somerville’s colder months, doors and windows stay closed longer, which can make odors and humidity more noticeable when filters are overdue, so consider slight schedule adjustments seasonally.
Make a simple log that includes the date, time, the initials of the employee who performed the work, the detergent brand used, and any observations such as minor warping or gummed corners. These notes will help you anticipate when to order replacements and prove due diligence during inspections.
Common Mistakes to Avoid
Do not skip the drying step. Moisture left in crevices can mix with grease and dust, creating a stubborn film quickly after reinstallation. Avoid using steel wool on stainless steel filters; abrasive fibers can scratch the surface and create crevices where grease clings. Steer clear of harsh, unapproved chemicals that may react with metals and cause pitting. Never reinstall filters that feel loose in their frame; even small deformations can rattle loose during service and create hazards. Finally, resist the temptation to postpone cleaning during busy weeks—buildup accelerates heat retention and elevates fire risk, particularly under high-BTU equipment.
Eco-Conscious Practices and Wastewater Considerations
Grease capture and wastewater management matter in any municipality. Prior to draining your soak tank, strain or skim out floating grease and place it into your approved waste container to protect plumbing. Use detergents labeled as biodegradable and food-contact safe when possible, and follow all local guidelines for disposal. The more consistently you clean filters, the less aggressive your chemicals need to be, which benefits both staff safety and the environment. Portable soak tanks with dedicated filtration can reduce the volume of detergent you use by allowing multiple cycles before change-out.
Troubleshooting Stubborn Grease
If you see caramel-colored films that persist after two soak-and-scrub rounds, try increasing the water temperature within safe limits and slightly boosting the detergent concentration, always respecting manufacturer guidance. Rotate filters in the tank to expose fresh solution to the worst spots. For charbroiler stations that generate smoke rich in resins, a second soak focused on the inlet edges can be especially effective. If residues remain despite correct method and chemistry, the filters may be near end-of-life and due for replacement.
When to Supplement with Professional Support
Your in-house team can handle routine filter cleaning, but periodic verification helps ensure that ducts, fans, and plenums remain as clean as your filters. A professional partner can document compliance, photograph inaccessible areas, and provide recommendations if your airflow patterns, capture efficiency, or duct cleanliness fall short. Many Somerville operators coordinate deeper services during seasonal menu changes or minor remodels so the kitchen returns to peak condition before a new promotional cycle. If traffic is especially heavy or your cooking style produces resinous smoke, schedule mid-season checks to catch problems early. At any point, pairing your schedule with trusted kitchen exhaust hood cleaning provides a backstop that keeps the entire system performing as intended.
Quality Control After Each Cleaning Cycle
After reinstalling filters, perform a simple airflow test. Hold a lightweight ribbon or strip of parchment at the hood opening; it should draw consistently toward the filters across the entire span. Uneven pull may indicate a misaligned filter, a bent baffle, or an obstruction further upstream. Smell for lingering odors during a brief cooking simulation; persistent smoke or steam suggests more frequent cycles are needed. Note your findings in the log so patterns are easy to track over weeks and months.
Visually inspect the grease trough and cup if your hood has one, and empty as needed. Even if filters are spotless, a full trough will overflow under heavy use and drip down the hood face, undoing your hard work and creating a slip hazard on the floor.
Filter Storage, Spares, and Replacement Strategy
Keeping at least one full spare set of filters allows you to swap quickly during peak periods and clean the dirty set when the kitchen is calm. Store spares in a clean, dry, well-ventilated space away from chemical vapors that can corrode metal. Tag each set to track age and rotation. Replace filters that show cracked welds, loose frames, or repeated clogging even after thorough cleaning. While high-quality stainless baffle filters can last years, the environment matters—heavy smoke, salt in coastal air drawn into make-up systems, and frequent thermal cycling can accelerate wear. Proactive replacement protects airflow and safety.
Integrating Filter Cleaning with Overall Hood Care
Filters are only one component in a larger capture-and-exhaust system. Wipe the interior canopy lip and accessible plenum surfaces regularly so sticky residues do not migrate back onto clean filters. Check fan belts for wear, listen for bearing noises, and confirm that make-up air arrives as designed; inadequate make-up air increases capture problems and encourages operators to push equipment closer to the hood opening, which can overheat components. Aligning filter care with basic hood housekeeping keeps the entire chain strong and reduces the need for emergency maintenance.
Staff Training and Accountability
Train cooks, dishwashers, and shift leads on the cleaning process so the team shares responsibility. Post a quick-reference sheet near the dish area with safety reminders, soak times, and rinse steps. Assign ownership of the log and review it during shift changes. When employees know how their work supports safety and comfort, they take pride in the results. Celebrate consistent logs, quick change-outs, and spotless reinstallations as part of your kitchen’s culture.
Frequently Asked Questions
Q: How often should I clean kitchen exhaust hood filters? A: Many Somerville kitchens clean weekly, but heavy fry or charbroil lines may require cleaning multiple times per week. Track visual soil, airflow, and odors to refine your interval.
Q: Can I put filters in the dishwasher? A: Some stainless baffle filters tolerate dishwashers, but verify manufacturer guidance first. Dishwashers may not fully dissolve heavy grease without a pre-soak, and aluminum components can discolor.
Q: What degreaser should I use? A: Choose a food-safe, non-caustic detergent designed for stainless steel and grease removal. Always follow dilution instructions and avoid unapproved caustics that can pit metal.
Q: How do I know a filter is worn out? A: Look for bent frames, loose baffles, cracked welds, and persistent clogging after proper cleaning. If airflow remains restricted, replacement is due.
Q: Is there a best time of day to clean? A: Schedule cleanings during low-volume windows such as midafternoon or after closing. Ensure equipment is cool and the dish area is clear.
Q: What if cleaning causes strong odors? A: That usually means accumulated grease is finally dissolving. Improve ventilation while soaking and rinsing, and strain residues before draining to reduce plumbing issues.
Q: Do filters affect fire suppression performance? A: Clean, correctly seated filters support proper airflow and help keep heat and vapors where suppression nozzles can be effective. Dirty or misaligned filters can compromise capture and safety.
Q: Should I label filter positions? A: Yes. Marking left to right or by station helps ensure consistent fit and makes it easier to diagnose uneven soiling or airflow concerns later.
Keep Your Kitchen Safe and Efficient
Reliable filter care is one of the simplest, highest-impact habits your team can adopt. By setting a schedule, using the right chemistry, and documenting each cycle, you protect your people, your equipment, and your reputation. If you want added assurance that your efforts match industry best practices, partner with local specialists who can validate your results, clean beyond the filters, and help you plan long-term maintenance. Reach out for trusted kitchen exhaust hood cleaning to keep your Somerville operation running clean, safe, and compliant.
