
Introduction: Why Dryer Vent Cleaning Matters for Somerville, New Jersey Homes
Dryers are among the most convenient appliances in any Somerville, New Jersey household, yet the vent that carries moist air and lint outside is often overlooked. Over time, this passageway accumulates lint, dust, and even bird nesting materials, restricting airflow and forcing the dryer to work harder. The result is longer drying times, higher energy use, potential moisture issues indoors, and, most importantly, a greater risk of lint ignition. Performing routine dryer vent cleaning is one of the simplest and most effective maintenance tasks you can undertake to protect your home, reduce wear on your dryer, and keep laundry day efficient and safe.
Somerville’s seasonal shifts—humid summers and chilly winters—can influence how moisture condenses inside vent ducts and how exterior terminations perform. In the summer, humid air meeting a cooler duct can lead to damp lint buildup. In the winter, cold air outside the hood can stiffen flapper doors and encourage lint to catch on rough edges. Understanding how regional climate affects airflow helps you choose the right cleaning schedule and methods. This guide explains how to perform a thorough vent cleaning safely, what to look for at each step, how to troubleshoot issues, and when it is time to call in a professional for complex vent configurations or stubborn obstructions.
Know Your Dryer Vent System: Components and Airflow Path
Before you begin, it helps to visualize the path air takes from the dryer to the outdoors. The journey typically starts with the dryer’s exhaust outlet, connects to a short transition duct, travels through a rigid or semi-rigid vent run inside walls or ceilings, and exits at an exterior hood or roof cap. Any sagging sections, crushed transition ducts, or excessive elbows can trap lint. Ideally, the run uses smooth, rigid metal ducting with minimal turns. Transition ducts should be short, semi-rigid or rigid, and not made of vinyl or thin foil that crushes easily. The exterior hood should have a damper that opens freely when the dryer runs and closes when off to prevent pests and weather from entering.
Pay attention to the vent length and the number of turns. Each additional elbow adds effective length, reducing allowable run distance and increasing static pressure. Long or complex runs common in some multi-story Somerville homes require more frequent inspection. When in doubt, consult your dryer manufacturer’s installation guide for maximum run lengths and adjust your cleaning frequency if your setup is near the limit.
Safety First: Preparation and Precautions
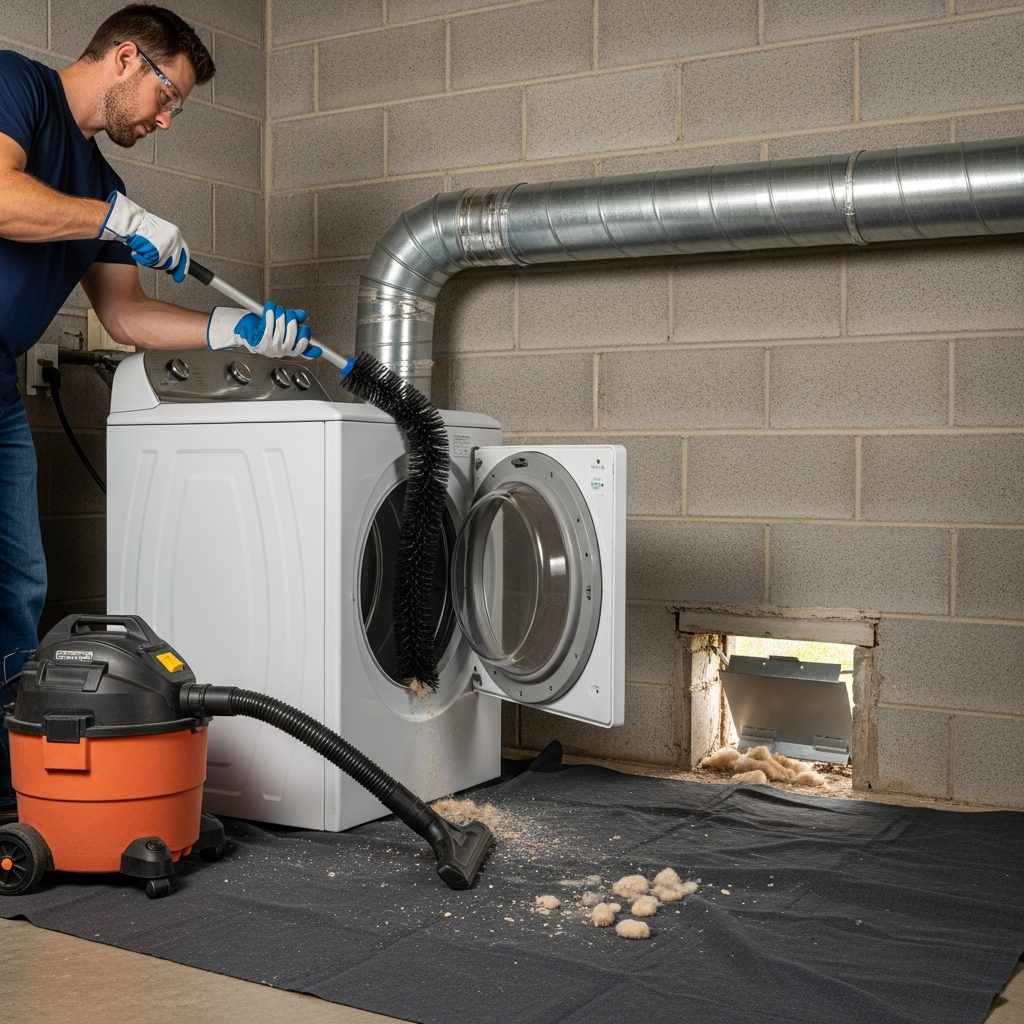
Start by unplugging the dryer or switching off the dedicated breaker. If you have a gas dryer, close the gas shutoff valve before moving the appliance and avoid disturbing the flexible gas connector. Clear the area around the dryer so you can move it without tripping hazards. Wear eye protection and a dust mask to avoid inhaling fine particles, and consider gloves to protect your hands from sharp metal edges on ducts and clamps. Keep a fire extinguisher nearby as a general safety best practice when working around lint and electrical equipment.
Vent cleaning dislodges a surprising amount of debris. Place a drop cloth or disposable sheet behind the dryer to catch lint and protect flooring. Have a vacuum with a narrow nozzle and a brush attachment ready. If your laundry room is tight—a common layout in older Somerville houses—measure your clearances in advance so you know how far the dryer can move without stressing the electrical cord or gas line. Never force the dryer if it catches on the transition duct; gently loosen clamps first and remove the duct before moving the appliance further.
Tools and Materials You Will Need
While you can accomplish a basic cleaning with a vacuum and a simple brush, a more complete toolkit improves results. Gather: a long, flexible vent brush or rotary brush kit with extension rods; a shop vacuum with hose attachments; a screwdriver or nut driver for clamps; replacement worm-gear clamps; a flashlight; a microfiber cloth; mild household cleaner for wiping surfaces; and painter’s tape to label positions or mark problem areas. If you plan to use a rotary brush attached to a drill, set the drill to low speed to reduce the chance of a brush head detaching in the vent.
Inspect your transition duct and exterior hood before starting. If the duct is crushed, kinked, or foil-type, plan to replace it with semi-rigid aluminum or rigid metal after cleaning. Verify that the exterior damper moves freely, and check for screens or cages. While screens might deter pests, they also trap lint and are not recommended on dryer exhaust hoods because they increase blockage risk.
Step-by-Step: Cleaning the Interior Connection and Transition Duct
Begin by unplugging the dryer and pulling it forward carefully. Loosen the clamp at the dryer outlet and the clamp at the wall or ceiling connection, then remove the transition duct. Shake it gently outside to free large clumps of lint and inspect for punctures or crushed sections. If you see damage or heavy residue embedded in the corrugations, plan to replace it with a new semi-rigid section. Wipe the dryer outlet with a slightly damp microfiber cloth to remove lint sticking to the rim and nearby surfaces.
Use the vacuum’s crevice tool to clean the lint trap slot area and the rear of the dryer cabinet, where lint often accumulates. Next, insert a flexible vent brush into the wall or ceiling connection leading toward the exterior. Feed the brush gently, rotating as you go to dislodge debris. Withdraw the brush occasionally to vacuum lint from the bristles and prevent pushing compacted material deeper into the line. If you have a rotary kit, proceed slowly and avoid aggressive drilling motions that could separate joints in older ductwork.
Step-by-Step: Cleaning the Exterior Hood and Final Run
Move outside to the vent termination. If your vent exits low on a sidewall, place a small tarp to catch debris. Open the hood and check for nesting materials, stuck flapper doors, or lint caked around the edges. Vacuum what you can reach and gently brush the interior. If your vent terminates through a roof cap, assess whether safe access is possible. Many Somerville homes have rooflines that require caution; if climbing is unsafe or the cap is high, postpone roof cap cleaning and consider hiring a pro for that portion.
With an assistant inside, you can coordinate a push-pull method. One person runs the brush from indoors toward the termination while the other vacuums and catches lint at the exterior. Alternate a few passes from each end until you notice little debris emerging. Inspect the damper movement and ensure it closes fully when not in use. If you find a screen installed across the hood opening, remove it to prevent future clogging, then recheck damper motion and replace the hood if it is cracked or warped.
Reassembly, Replacement, and Airflow Testing
Once the duct run is cleared, reinstall or replace the transition duct. If replacing, cut a new semi-rigid section to the shortest workable length without sharp bends. Attach it using worm-gear clamps, ensuring the duct slides over the dryer outlet and the wall stub before tightening. Avoid foil tape on flexible joints and do not use screws that penetrate the duct, as they can snag lint. Slide the dryer back gently, watching the duct so it does not crimp. Plug the dryer in and, for gas models, reopen the shutoff valve.
Run the dryer on air fluff or low heat for several minutes. Go outside and check the airflow at the hood. You should feel a strong, steady stream of air and see the damper open fully. Return indoors and verify there are no unusual rattles or smells. If drying performance improves and there are no leaks or kinks, the cleaning is complete. If airflow remains weak, suspect a hidden elbow packed with lint, a long horizontal run with sagging sections, or an obstruction in a roof cap. In such cases, a mid-run access point or professional rotary cleaning may be necessary.
How Often to Clean in Somerville and Seasonal Considerations
Dryer usage patterns vary, but many Somerville families find that cleaning every six to twelve months is sufficient. Larger households, homes with pets, or those washing plush fabrics that shed heavily benefit from more frequent maintenance. After major renovations, especially drywall sanding or insulation work, consider an extra cleaning because airborne dust accelerates lint accumulation. Mid-summer and mid-winter checks are smart in central New Jersey, when humidity peaks or freezing temperatures can affect exterior components. During a midyear review, confirm that the damper still swings freely and that vegetation or snow has not obstructed the outlet. If you share a vent with a neighbor in a multi-unit building, coordinate responsibilities so the entire run is addressed consistently.
It can be helpful to supplement your routine with a mid-cycle inspection. Halfway between full cleanings, empty the lint screen, vacuum around the lint trap housing, and power on the dryer to observe airflow outside. If the volume drops noticeably between full cleanings, shorten your interval. If you are uncertain or see signs of moisture around the laundry area, consider scheduling midyear professional support. Inserting a mid-cycle appointment for dryer vent cleaning can keep performance high without waiting for a major blockage to develop.
Signs Your Vent Is Due for Attention
Pay attention to what your dryer is telling you. Clothes that remain damp after a normal cycle, increased heat in the laundry room, or a burning smell indicate poor exhaust. The top of the dryer becoming uncomfortably hot, lint gathering around the door seal, or condensation on windows near the laundry area are also red flags. Outside, a damper that barely opens, visible lint streaks, or a flap stuck by sticky residue suggests restricted flow. New noises—thumps from a loose duct, whistling from a crushed bend—are further clues. Addressing these signs promptly prevents premature heating element failures and reduces the chance of lint ignition.
Another underappreciated symptom is excessive auto-dry times. Modern dryers estimate dryness by monitoring exhaust temperature and moisture. When airflow is restricted, readings are skewed, causing longer cycles and uneven results. If your machine suddenly needs two cycles for a standard load that used to dry in one, do not assume the appliance is failing. Start by cleaning the vent and re-evaluating performance before calling for appliance service.
Troubleshooting Stubborn Blockages and Complex Runs
Some vents are straightforward, but others snake through tight joist bays or extend long distances to reach a roof cap. If your brush consistently hits resistance at the same point, you might be encountering an elbow packed with damp lint or a screw protruding into the duct. Mark the insertion depth, then measure the approximate location on your floor plan to identify where the blockage likely sits. If it is accessible from a basement or utility space, consider installing a cleanout fitting for future maintenance. If rodents or birds have introduced nesting material, you may need to carefully extract debris with a vacuum from the exterior while gently agitating from inside.
Water in the duct is another challenge. In poorly insulated runs or those crossing unconditioned spaces, warm moist air can condense and pool. If you find signs of moisture—musty lint, rust staining—improve insulation around the duct in accessible areas and verify the vent pitch directs water toward the exterior. For roof terminations, confirm the cap is designed for dryers and not a universal vent with a restrictive screen or backdraft damper that sticks in cold weather.
Upgrades That Enhance Safety and Efficiency
Consider swapping a flimsy foil transition duct for a semi-rigid aluminum type that holds shape without crushing. Replace damaged exterior hoods with low-resistance models that open fully under modest airflow. Where the vent passes through cold spaces, add insulation to limit condensation. Shorten the overall run length during remodels by relocating the laundry area or rerouting the duct with fewer elbows. In some Somerville homes, installing a recessed dryer box prevents the transition duct from kinking while letting the dryer sit closer to the wall. These modest improvements reduce lint buildup, cut drying times, and make future cleanings easier.
Another upgrade is adding a reminder system. Mark your calendar or set recurring reminders tied to seasonal chores such as HVAC filter changes. Some smart dryers track cycle counts and can alert you when reduced airflow is detected. Combine those cues with a quick outside airflow check and you will catch most problems before they become disruptive.
Frequently Asked Questions
Q: How long does a thorough cleaning take for a typical Somerville home? A: For a straightforward, short vent run, expect around one to two hours including setup and cleanup. Complex runs, roof terminations, or heavily compacted lint may take longer, especially if you proceed cautiously to avoid damaging older ducts.
Q: Can I clean from just one side, either inside or outside? A: Yes, but two-sided access is more effective. Alternating from both ends dislodges compacted lint more completely and helps you verify clear airflow at the termination.
Q: Is it safe to use leaf blowers or high-pressure air? A: Caution is advised. Excessive pressure can force lint into hidden cavities, disturb joints, or blow debris into the dryer cabinet. Purpose-built brushes and controlled vacuuming offer better results with less risk.
Q: What about screens over the exterior hood to block pests? A: Screens catch lint and can cause rapid blockages. Use a proper dryer hood with a damper that closes when not in use. If pests are a concern, choose a hood with a well-designed damper and inspect regularly.
Q: My laundry still takes too long after cleaning. What next? A: Recheck the transition duct for kinks, confirm the hood opens fully, and inspect for hidden elbows. If the run is very long, you may need a more powerful cleaning method or an adjustment to the duct routing. Also ensure the lint trap and dryer internals are clean per the manufacturer’s guidance.
Q: How often should rental properties in Somerville be cleaned? A: At least annually, with documentation. High turnover or heavy laundry use calls for a semiannual schedule. Clear communication with tenants about emptying lint screens each load helps maintain airflow between professional visits.
Protect Your Home in Somerville Today
With careful preparation and patient, methodical work, you can complete a safe, effective dryer vent cleaning that restores strong airflow and reduces risk in your Somerville, New Jersey home. If you encounter a long, complex run, a roof termination that is hard to reach, or recurring moisture and lint issues, enlist a local specialist for comprehensive help. For expert results and peace of mind, schedule professional dryer vent cleaning and enjoy faster cycles, improved safety, and a laundry room that runs at its best.
