
Introduction
Starting your first ductwork project can feel overwhelming, especially in a place like Somerville, New Jersey, where summer humidity and winter chills both push your comfort system to its limits. The good news is that beginners can achieve excellent results with a clear plan, the right tools, and a focus on airflow fundamentals. This step-by-step guide explains essential terms, materials, and best practices so you can approach your first installation with confidence. If you decide you would prefer expert assistance at any stage, you can always lean on professional air duct installation to ensure your project meets performance and code expectations.
Think of ducts as the arteries of your heating and cooling system. When sized and sealed correctly, they quietly deliver comfort to every room. When undersized, leaky, or poorly located, they create noise, temperature swings, and higher energy use. This guide is written in plain language for first-timers, with a focus on real-world conditions found in Central New Jersey homes.
Beginner-Friendly Concepts You Must Know
Before touching tools, get familiar with a few core ideas that govern every successful installation. Understanding these basics will help you make good choices throughout the project.
- Airflow (CFM): The volume of air moving through the ducts. Each room needs a certain amount of airflow to feel comfortable.
- Static Pressure: The resistance your blower must overcome to push air through ducts and fittings. Too much resistance reduces airflow and stresses equipment.
- Supply and Return: Supply ducts deliver conditioned air to rooms. Returns bring room air back to the air handler to be filtered and reconditioned.
- Equivalent Length: Bends and fittings add resistance. A short run with many tight elbows can act like a much longer duct.
- Sealing and Insulation: Mastic and UL-rated tapes create airtight seams. Insulation reduces energy loss and prevents condensation on cold ducts.
Tools and Materials for First-Time Installers
You do not need a metal shop to install reliable ductwork, but you do need a basic toolkit and code-compliant materials. Assemble these before you start so you can work safely and efficiently.
- Measuring tape, level, and laser measure
- Utility knife, sheet metal snips, and aviation snips
- Drill/driver with sheet metal bits
- UL 181-rated foil tape and duct mastic
- Hangers or strapping for supports
- Takeoffs, collars, elbows, wyes, and boots
- Insulated flex duct for branches and rigid metal for trunks
- Balancing dampers and register grilles
- Protective gloves, eye protection, and dust mask
Planning Your Layout
Good planning saves hours of rework. Start with a simple floor plan that marks the location of the air handler, main trunks, branch lines, supply registers, and returns. Consider how air will move through each room: registers should throw air across the space rather than dump it at your feet, and returns should be clear of obstructions.
Walk through the home and identify structural constraints. Joist directions, stairwells, plumbing stacks, and beam pockets all influence where ducts can run. In older Somerville homes with finished basements, soffits or chases may be needed to conceal trunk lines without sacrificing headroom.
Sizing Basics for Beginners
Begin by estimating the airflow needs of each room based on size, window exposure, and usage. Bedrooms and living areas typically get higher priority than closets or pantries. Select duct sizes that deliver the target CFM at reasonable velocities. Avoid long, skinny branches and excessive elbows that add resistance.
As a rule of thumb for beginners, it is often safer to choose slightly larger branches rather than risk undersizing, but do not overshoot so far that air barely moves. Balance is key. Place manual dampers near the trunk on each branch to adjust flows later.
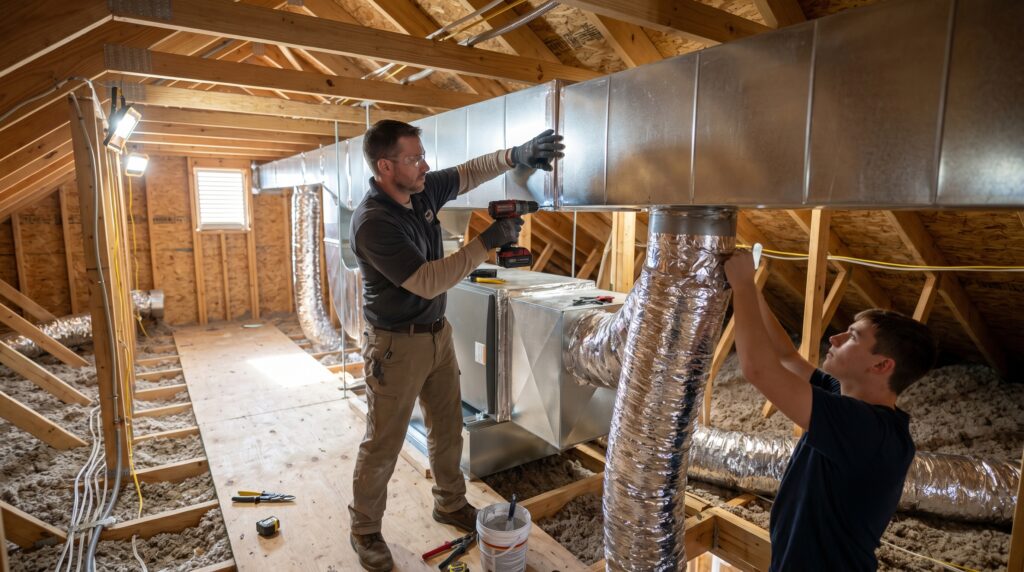
Step-by-Step Installation
- Set the Equipment and Plenums: Position the air handler or furnace according to manufacturer guidance. Install properly sized supply and return plenums with tight, sealed joints.
- Run the Main Trunks: Route supply and return trunks first, keeping them straight, level, and well-supported. Avoid sharp transitions and use long-radius elbows where possible.
- Add Takeoffs and Branches: Install takeoffs to each room. For flex branches, pull the inner liner tight, secure it with a drawband and mastic, and smooth the insulation and jacket over the collar.
- Install Boots and Frame Openings: Secure boots at floor, wall, or ceiling locations. Seal gaps around boots to prevent leaks and drafts.
- Seal All Joints: Apply mastic generously at seams, screws, and fittings. Use UL 181 foil tape where recommended, then mastic over the tape for a durable seal.
- Insulate Where Needed: Any duct outside the conditioned space should be insulated to prevent condensation and energy loss. Seal the vapor barrier continuously.
- Add Balancing Dampers: Place manual dampers on branches. Label their positions for easy future adjustment.
- Support the System: Strap or hang ducts at code-compliant intervals. Support flex with wide hangers to avoid compression or sagging.
- Test and Adjust: Power up the system and check airflow, temperature split, and static pressure. Adjust dampers and registers to fine-tune comfort.
Somerville-Specific Tips
Central New Jersey summers are humid, so pay extra attention to insulation and vapor barriers on cold supply ducts that run through attics or garages. Even small tears can lead to dripping and staining. In winter, make sure return pathways are abundant enough to keep rooms balanced when doors are closed; otherwise, you can end up with chilly spots and unnecessary noise from starved returns.
Basements in older homes can be drafty or partially conditioned. If your trunks run through these areas, seal any rim joist leaks and consider upgrading insulation around ductwork. This small step improves both comfort and system efficiency.
Quality Checks During the Project
Pause regularly to confirm your work. Look for any kinked flex, crushed elbows, or unsealed seams. Verify that supports are tight but not compressing ducts. Check clearances from chimneys and flues, and keep access paths open for future maintenance. A mid-project review can save countless hours later.
If you become uncertain about sizing, routing, or balancing strategies, this is a smart point to bring in professional air duct installation support. A pro can validate your plan, spot potential noise issues, and ensure you will hit comfort targets.
Common Beginner Mistakes and How to Avoid Them
- Too Many Elbows: Every bend adds resistance. Use gentle transitions and minimize fittings.
- Loose Sealing: Tape alone is not enough. Use mastic at all joints and around screws.
- Sagging Flex: Support flex with wide straps and keep runs short and straight.
- Blocked Returns: Do not place returns behind doors or furniture that can block flow.
- No Balancing Dampers: Without dampers, some rooms will be too warm or too cool.
- Registers in the Wrong Spots: Aim supply air across the room, not directly at a wall or sofa.
Working Safely
Turn off power to equipment before working near the air handler. Wear gloves and eye protection when cutting metal or duct board. Keep a clean workspace—small sheet metal shards and insulation scraps can be hazardous. Follow local code for firestopping where ducts pass through rated assemblies, and maintain required clearances to combustibles.
Testing, Balancing, and Finishing Touches
With ducts in place, start the system and verify airflow at each register. Adjust damper positions to distribute comfort evenly. If you have access to an anemometer or balancing hood, use it for more accurate measurements. Check static pressure at the supply and return plenums; unusually high readings often signal duct restrictions or poor sealing.
Finally, install return grilles with appropriately sized filters. Label the filter type and replacement schedule where it is easy to see. Take photos of hidden junctions and create a simple map for future service, including damper positions and register sizes.
Frequently Asked Questions
Q: Can a beginner use flexible duct? A: Yes, flex is beginner-friendly when installed correctly. Keep it taut, avoid sharp bends, support it frequently, and seal both ends thoroughly.
Q: Do I need more than one return? A: Multiple returns usually improve comfort and reduce noise, especially in multi-level homes. At minimum, provide clear return pathways so closed doors do not choke airflow.
Q: How do I know my ducts are sized right? A: If rooms reach setpoint without long run times, registers are not excessively noisy, and static pressure is within the equipment’s recommended range, your sizing is likely close. Professional testing offers added assurance.
Q: What insulation should I use? A: Use insulation rated for ducts, and follow local requirements for R-values in attics or crawlspaces. Ensure the vapor barrier is continuous to prevent condensation.
Q: What if one room stays uncomfortable? A: Re-check damper settings, register direction, and obstructions. Consider upsizing the branch or adding a return if airflow remains low.
Q: Are wall cavities OK for returns? A: Only when permitted and properly lined. Dedicated return ducts deliver cleaner, more reliable results.
Take the Next Step Toward a Comfortable Home
If you are ready to move from planning to action but want a helping hand to guarantee performance, bring in a trusted team to review your design and complete the work. Partnering with professionals for dependable air duct installation can accelerate the process, reduce headaches, and deliver the quiet, even comfort you expect in every season.
PREVIOUS: Air Duct Installation How To Install In Somerville New Jersey
NEXT: Air Duct Installation Process Steps In Somerville New Jersey
