
Planning a new or replacement air duct system in Somerville, New Jersey requires more than a toolbox and a free weekend. A successful project protects your indoor air quality, aligns with local codes, and delivers efficient airflow to every room. This step-by-step checklist is designed to help homeowners, property managers, and remodelers navigate the entire process with clarity. Early on, it helps to understand what a complete scope looks like and where professional support fits in. If you prefer expert guidance from the start, consider consulting local specialists who focus on air duct installation so your plan, materials, and workmanship align with Somerville best practices.
This guide is intentionally comprehensive. It follows a logical sequence, from assessing your building and goals to commissioning the finished duct network. In addition to helping you prepare, it offers checkpoints you can use to verify quality along the way. Whether you live in a historic home near Main Street or a newer property on the outskirts of Somerville, the same fundamentals apply: careful planning, accurate load calculations, properly sized ducts, tight connections, and meticulous balancing. The payoff is cleaner air, consistent temperatures, quieter operation, and HVAC equipment that lasts longer because it is not forced to overcome hidden restrictions or leaks.
Define objectives and constraints
Start with the why. Are you replacing undersized or leaky ducts, adding supply runs to a renovated space, or upgrading to support a high-efficiency furnace or heat pump? Clarifying goals reveals what success looks like: steadier room-to-room temperatures, better humidity control, improved filtration, or a quieter system. At the same time, map your constraints: attic or crawlspace access, unusual framing, mechanical chases, and rules specific to your building. In Somerville, older homes often have tight cavities and mixed materials that demand creative yet code-compliant routing. Document these realities before you sketch a single line of ductwork.
Along with goals and constraints, list health and comfort priorities. For example, allergy-sensitive households may want advanced filtration and sealed return paths to limit infiltration of fiberglass dust or attic air. Households concerned with noise may prefer lined return trunks and carefully chosen velocities. Finally, note architectural priorities. If a finished basement ceiling must remain pristine, you might need flatter oval duct or re-routed trunk lines to preserve headroom.
Collect building data and perform load calculations
Measure the building shell and each conditioned room. Record insulation levels, window type and orientation, ceiling heights, and any unusual heat gains like large west-facing glass. These inputs feed recognized load calculation methods that determine how much heating and cooling each room needs. Without this foundation, any duct layout is guesswork. Loads influence equipment sizing, equipment airflow (cfm), and ultimately duct sizes and register selections. If you are replacing an older system, avoid simply copying the previous layout; changes to windows, insulation, or usage patterns can make yesterday’s design inadequate for today.
Next, translate loads into airflow requirements. Establish target cfm by room and total system airflow at the equipment. Then confirm available static pressure, filter selection, and coil pressure drop so you can size ducts to deliver the right cfm without excessive noise or energy use. A well-designed return path is as critical as supplies; without balanced returns, doors closing can starve rooms of air or pull unfiltered air through gaps in the building shell.
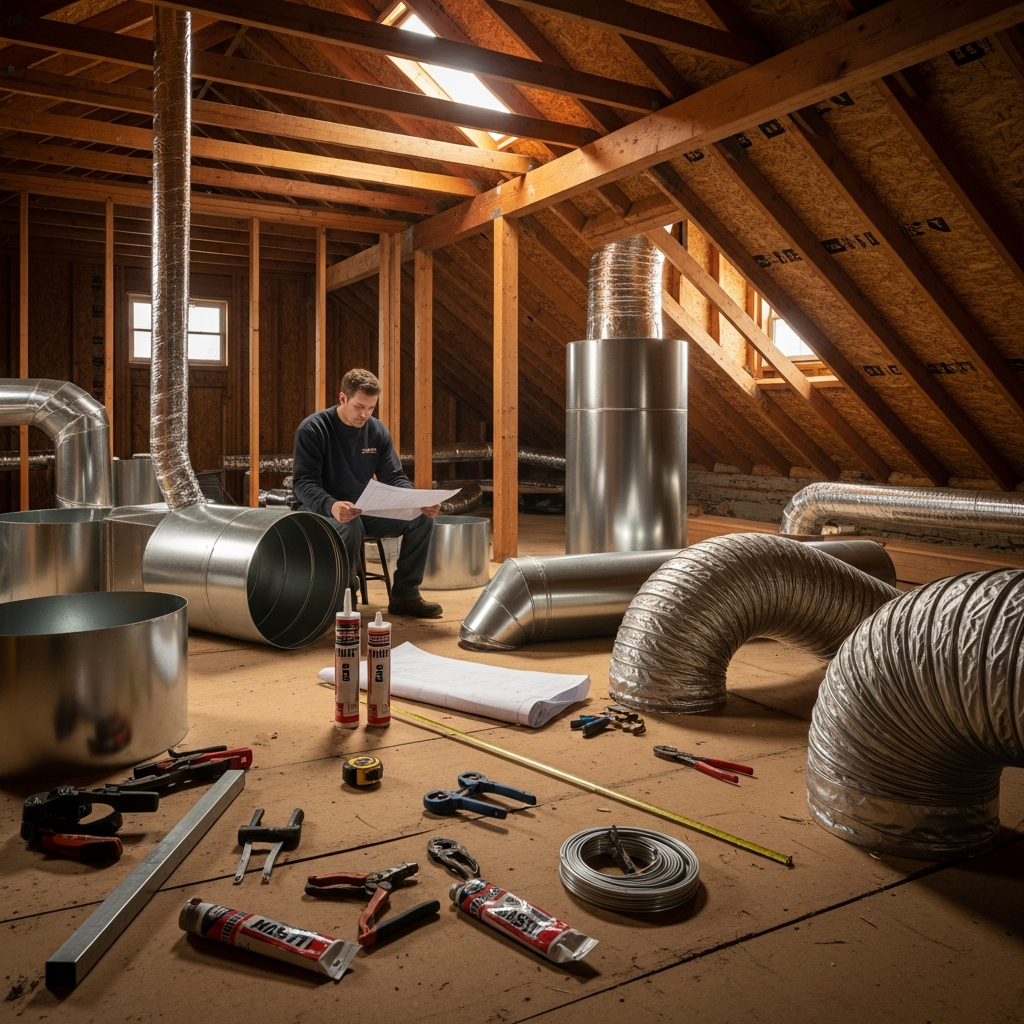
Select a duct strategy and materials
Choose between sheet metal, rigid fiberglass duct board, or high-quality flex duct used strategically. Many projects use a hybrid. Rigid trunks maintain predictable airflow and resist crushing, while short flex runs can simplify final connections to diffusers when properly supported and pulled tight. Pay attention to insulation values when ducts pass through unconditioned spaces; condensation control and energy performance depend on both insulation and air sealing. Select mastic, UL-181 tapes, and hangers appropriate for your chosen material.
Plan fittings with care. Long-radius elbows, smooth transitions, and wyes with proper angles all reduce turbulence and pressure loss. Avoid sharp turns right after the air handler or coil. Provide straight duct sections before and after major fittings and at registers where possible. Choose supply registers and return grilles that quietly deliver room airflow without drafts. The best layouts look simple on paper but evolve from dozens of tiny decisions that add up to smooth, quiet performance.
Map the duct layout
Sketch a scaled plan showing trunk lines, branch takeoffs, supply registers, and return locations for each floor. Note sizes for every segment and fitting, target cfm per room, and damper positions at takeoffs to allow balancing. Consider service access: filters, coils, and critical joints should be reachable for maintenance. If you are reusing equipment, verify clearances and orientation of the supply plenum and return drop so new ducts do not block panels or drains.
Route ducts to minimize length and avoid unnecessary fittings. Keep returns away from potential contaminants such as garages or utility closets. Respect fire and smoke separation boundaries as required by building codes. In older Somerville homes, framing can vary; be ready to adapt with transitions that preserve cross-sectional area rather than compressing ducts into awkward shapes that choke airflow.
Prepare the jobsite
Protect finished surfaces and establish safe paths through attics, basements, or crawlspaces. Stage materials so the crew can work efficiently: ducts pre-cut to approximate lengths, fittings labeled, hangers and sealants within reach. If replacing an existing system, isolate the area to prevent dust migration and capture debris during demolition. Confirm that electrical shutoffs, gas lines, and condensate paths are secured before demolition and installation begin.
Ventilation matters during installation. Cutting duct board or metal creates fine particles. Use proper PPE and housekeeping so dust does not settle in open ductwork. Cap open ends at the end of each workday to prevent contamination and to keep unconditioned air from moving through a partially finished system.
Install the air handler connections
Begin at the equipment. Build a smooth supply plenum and return drop sized for airflow and static pressure constraints. Seal every seam and joint with mastic or approved tape, then reinforce as needed. Provide adequate straight duct after the coil and before the first takeoff to stabilize airflow. If you must include an elbow immediately off the unit, use turning vanes or a radius elbow sized appropriately to avoid a noisy, high-loss bend.
Integrate filtration. Choose a filter rack that seals firmly and can be serviced without tools. Confirm that filter pressure drop matches your available static pressure. For advanced filtration or air cleaners, ensure access and service clearances so replacements are not neglected.
Run trunk lines and branches
Install main trunks level and supported at the manufacturer’s recommended intervals to prevent sagging. Use hangers that do not compress insulation. At each branch takeoff, cut clean holes, insert the fitting fully, and seal both the collar and the takeoff connection. For flex runs, pull the inner liner tight, use two straps on each connection, and keep bends gentle with large radii. Avoid running flex directly across sharp edges or squeezing it behind obstructions; such shortcuts can double the friction loss and reduce delivered cfm.
As you advance, label dampers and verify that register boots are square, secure, and sealed to the building envelope to prevent air leakage into wall cavities. Seal penetrations where boots meet drywall or flooring. Air that escapes before reaching the register represents lost comfort and efficiency.
Install returns for balanced airflow
Give the return path equal attention. Undersized returns create whistling grilles, high static pressure, and premature equipment wear. Provide dedicated returns for larger rooms or use a central return strategy with transfer grilles or jump ducts where appropriate. Seal return side joints meticulously because any leaks here can draw dusty attic or crawlspace air into the system. When returns pass through warm, humid spaces, ensure adequate insulation to prevent condensation.
Place returns where they “see” the room well. Avoid returns too close to supplies, which can short-circuit airflow. In multi-story homes, returns at both levels help stabilize temperatures and reduce stairwell convection effects.
Seal, insulate, and pressure test
Once ducts are assembled, perform comprehensive sealing with mastic and approved tapes on all seams and joints. Insulate ducts in unconditioned spaces to the R-values expected for the Somerville climate and to meet applicable codes. Then pressure test the duct system with a calibrated fan and gauge to quantify leakage. Many issues become visible only under test pressure, such as small gaps at takeoffs, boots, or around the air handler. Fix defects and verify again. Mid-project testing is especially valuable in renovations where access becomes more difficult after finishes go up.
In the middle of the project, step back and assess performance goals against reality. If readings or observations suggest that a branch is starved or a room will be noisy, adjust before drywall or insulation closes pathways. If you did not start with a contractor, this is a natural checkpoint to bring in an experienced pro for a review or partial assistance, particularly one who regularly performs air duct installation and verification testing in Somerville homes.
Balance, commission, and document
With leakage under control, open dampers and measure airflow at each register. Compare to target cfm and adjust branch dampers until readings land within acceptable tolerance. Confirm that the equipment’s fan speed, coil configuration, and filter selection align with your static pressure and airflow goals. Check temperature split across the coil or heat exchanger, observe condensate management, and listen for objectionable noise at key ducts and registers. Make final tweaks while access is easy.
Document your results. Record final damper positions, measured airflow by room, and equipment settings. Keep photos of concealed junctions and critical seals. Future service benefits tremendously from a simple, accurate record, and should you modify a space later, you will have a reliable baseline for the next phase.
Somerville-specific considerations
Somerville’s seasonal swings demand duct systems that perform in humid summers and cold winters. Pay attention to supply register placement for both cooling and heating comfort. Rooms over garages and additions over crawlspaces often need extra care with sealed, insulated ducts and well-designed returns. Many established neighborhoods feature older framing; verify fire-blocking details and chase pathways early to avoid late surprises. In multifamily or mixed-use buildings, coordinate with other trades to ensure ducts, fire dampers, and penetrations comply with separation requirements.
Noise control is another local priority. Homes situated near busy corridors benefit from lower duct velocities and lined returns that dampen sound. Thoughtful grille selection and avoiding abrupt transitions near living areas can make the difference between a system you do not notice and one that hums or hisses.
Quality assurance checklist
Before declaring the job complete, review this condensed QA list. Verify that all joints are sealed, supports are properly spaced, and ducts remain round or full-profile without kinks. Confirm insulation integrity and vapor barriers where needed. Check that supply and return registers are anchored squarely and sealed to the envelope. Inspect that filters seal and are accessible. Validate that measured airflow matches targets and that rooms reach setpoints without significant stratification or drafts. Listen for rattles or whistles and correct them. Finally, verify that documentation is complete and that the homeowner understands filter changes, access points, and basic operation.
Maintenance and ongoing performance
A great installation deserves great maintenance. Mark a calendar for filter changes and periodic inspections. Watch for changes in noise or comfort that suggest a slipping connection, a blocked register, or a damaged flex run. If you renovate, revisit duct sizing and branch routing rather than simply adding a tee to a convenient trunk. Over time, houses shift and occupants change habits; staying attentive keeps performance high.
FAQ
Q: How do I know if my current ducts need replacement rather than repair? A: Look for persistent comfort imbalances, visible damage or crushing, chronic dust near registers, and high static pressure readings even after sealing. A professional evaluation can compare delivered cfm to targets and recommend focused repairs or a redesign.
Q: What materials are best for a quiet system? A: Rigid trunks with smooth interiors, long-radius fittings, and short, taut flex branches typically provide the best combination of quiet operation and efficiency. Lined return trunks can further reduce noise in sensitive areas.
Q: Can I reuse existing registers and boots? A: Sometimes, but older components may be undersized, noisy, or poorly sealed to surrounding surfaces. Upgrading to properly sized, well-sealed components frequently yields noticeable comfort improvements.
Q: Why is pressure testing important? A: Testing finds leaks you cannot see and quantifies total leakage so you can prioritize fixes. Improvements verified by measurement usually deliver better comfort and reliability than visual inspections alone.
Q: How long should the balancing process take? A: It varies by home complexity, but allocating focused time to measure and adjust each branch ensures that design intent becomes reality. Rushing this step undermines the value of all the careful work that came before.
Next steps for your Somerville project
If you are ready to move from planning to action, gather your notes, finalize your layout, and schedule time for careful, clean installation practices. For a smooth, code-aligned experience from design to commissioning, partner with a local team that routinely delivers reliable air duct installation in Somerville homes and small businesses. Start with a conversation about your rooms, comfort goals, and accessibility challenges, and proceed with confidence knowing your system will be measured, balanced, and documented for lasting performance.
