
Debating whether to use a dryer vent installation kit or hire a professional service in Somerville, New Jersey is a smart step before you open the toolbox. On the surface, kits promise a quick route to a working vent. In practice, the differences in materials, routing strategy, safety verification, and long-term performance are substantial. If you are weighing your options for dryer vent installation, this in-depth comparison will clarify when a kit can work, when specialized help is the better fit, and how to protect your home regardless of the path you choose.
A dryer vent is a small system with an outsized impact on safety and efficiency. It must carry heat, moisture, and lint outside with minimal resistance while preserving the building envelope. Shortcuts can lead to longer dry times, premature wear on the dryer, moisture problems inside walls, and unnecessary risks. The right approach depends on your home’s layout, the path to the exterior, and your comfort with tasks like drilling, sealing, and testing.
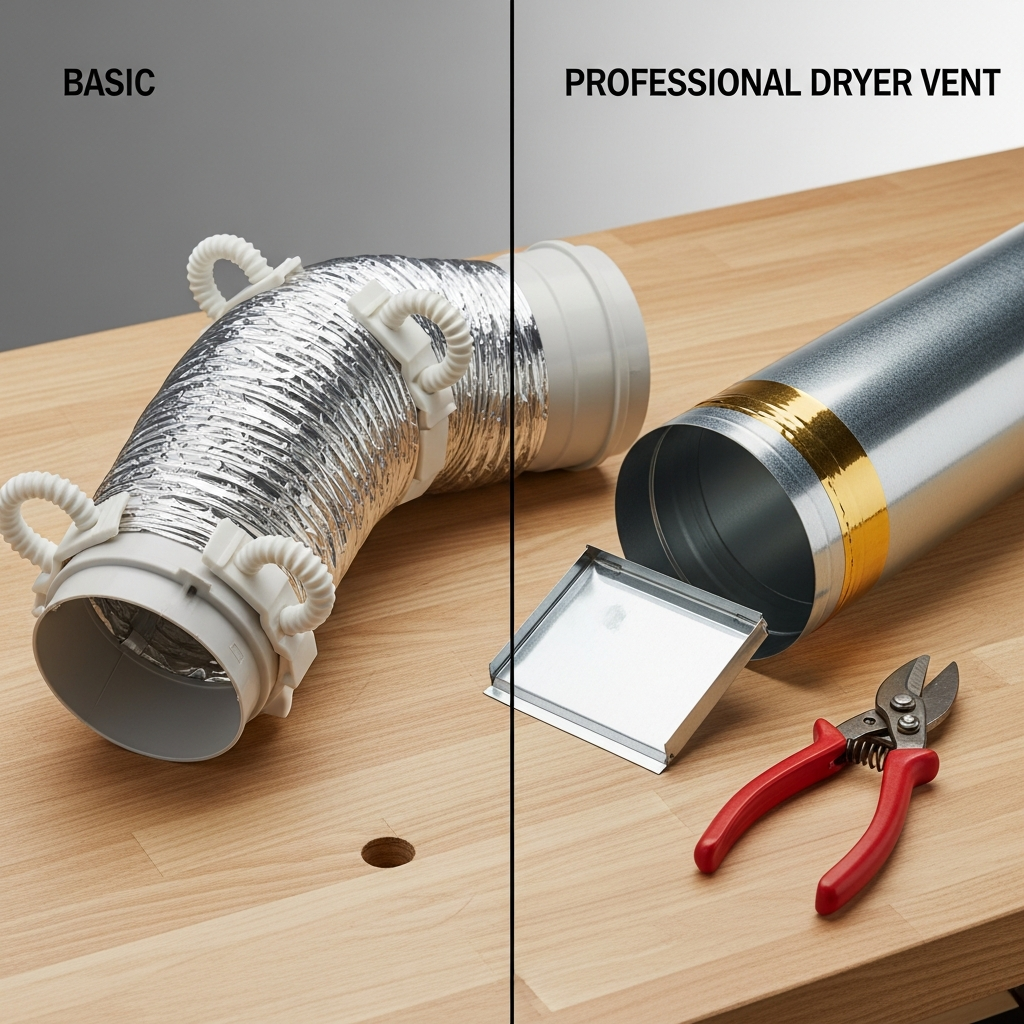
What is inside a typical kit
Common kits include flexible ducting, basic connectors, clamps, and sometimes a simple wall cap. While helpful for quick hookups, many kits do not include smooth-wall rigid metal sections for the main run or a premium termination with a reliable damper. The convenience of an all-in-one box is appealing, but it may not align with best practices if your route is longer or includes multiple elbows.
- Flexible or semi-rigid duct that can kink if pushed into tight spaces.
- Basic clamps that may loosen under vibration if not installed carefully.
- Wall caps that lack robust backdraft dampers or weather-resistant features.
- Limited guidance on code alignment, routing strategy, and airflow verification.
What a professional brings to the table
Experienced installers plan the route to minimize resistance, select smooth-wall rigid metal for the main run, and choose a termination suited to your exterior. They also handle penetrations cleanly, seal the cap against weather, and verify airflow before they leave. This thoughtful approach reduces the chance of callbacks, keeps the dryer operating efficiently, and protects your building envelope.
- Accurate measurement of effective length and elbow penalties to stay within manufacturer limits.
- Use of quality fittings, secure supports, and high-temperature foil tape.
- Weather-appropriate sealing at exterior penetrations and caps with reliable dampers.
- Commissioning that confirms damper movement, leak-free joints, and strong exhaust flow.
Key differences: kit vs. pro
Looking beyond the marketing language, several practical differences emerge between doing it yourself with a kit and hiring out the work. Understanding these distinctions helps you align the approach with your home’s needs and your comfort level.
- Materials: Kits may rely on foil or flex for primary runs, which can trap lint. Pros prioritize rigid metal ducting with smooth interiors that support strong airflow.
- Routing strategy: Kits often assume a short, simple path; professionals redesign routes to reduce elbows and shorten runs where possible.
- Exterior termination: A basic cap can stick or leak; professionals install purpose-built caps, flash or seal them properly, and confirm damper movement.
- Sealing and supports: Pros seal each joint with the right materials and place supports to prevent sagging and vibration.
- Testing and verification: Professional commissioning catches issues immediately rather than after weeks of frustrating dry times.
Scenarios where a kit might suffice
There are situations where a careful DIYer can achieve an acceptable result using improved components beyond what a basic kit provides. If your dryer is on an exterior wall with a very short, straight path to the outside and you are comfortable with precise drilling and sealing, a kit—upgraded with rigid sections and a better cap—can be workable. The key is to avoid the temptation to use thin, collapsible ducting for anything other than a minimal transition.
- Short, nearly straight runs with minimal or no elbows.
- Easy access to both sides of the penetration, such as unfinished basements or first-floor exterior walls.
- Confidence with measuring, cutting, and weather sealing the termination.
- Willingness to test airflow and adjust if performance is lacking.
Scenarios where a professional is the better choice
Complex routes, long runs, masonry penetrations, shared walls, roof terminations, and tight utility chases all favor experienced hands. Multifamily settings may introduce code limitations and access constraints. If you are relocating a laundry room or replacing a questionable vent routed through an attic or crawlspace, it is wise to bring in a pro. Their planning and verification help ensure safety and durability.
- Routes with multiple elbows or extended lengths that challenge manufacturer limits.
- Penetrations through brick, stone, or roofing materials that demand specialized tools and sealing.
- Limited access in finished spaces where clean, precise work is essential to protect interiors.
- Need for commissioning, including airflow measurement and damper verification.
Common mistakes with DIY kits
The most frequent pitfalls relate to materials and routing. Using foil accordion ducting for long runs, adding unnecessary turns, or compressing the duct behind the dryer all undermine performance. Skipping weather sealing at the exterior allows moisture intrusion, while screws that penetrate the duct interior catch lint and create a hazard. Another common issue is installing a termination with a screen not designed for dryers; it clogs quickly and restricts airflow.
How to decide: a step-by-step framework
- Map the route and count elbows. Compare the effective length to your dryer’s specifications.
- Identify the exterior substrate (siding, brick, stone, roofing) and your comfort level with making a clean, sealed penetration.
- Evaluate materials you plan to use. If you cannot source or install rigid metal for the main run, reconsider the approach.
- Assess accessibility. Tight chases and finished ceilings complicate the work and increase the risk of hidden problems.
- Plan your commissioning. If you cannot test airflow and verify damper movement, factor in a professional check.
Somerville-specific considerations
Local homes often blend older framing with updated interiors, making straight lines rare. Brick or stone exteriors call for careful coring and robust sealing to manage weather. Roof terminations demand proper flashing and safe access for future maintenance. These conditions can nudge a borderline DIY project into professional territory, not because a homeowner lacks skill, but because specialized tools and experience protect finishes and ensure compliance.
Maintenance matters either way
Whether you assemble the system yourself or hire an expert, maintenance is essential. Clean the lint trap with every load. Keep the exterior termination free of plants and debris. Watch for longer dry times, heat around the dryer, or visible lint at the cap. Schedule periodic inspections, especially in high-use households or homes with pets. Early attention prevents minor restrictions from becoming major problems.
Frequently asked questions
Q: Can I use a kit for a second-floor laundry closet? A: It depends on the route. Second-floor setups often require roof terminations and longer runs with more elbows, which can challenge kits. If the path is complex, a professional is usually the better choice.
Q: Are screens acceptable on the exterior termination? A: No. Screens trap lint. Use a dryer-specific cap with a backdraft damper that allows free airflow.
Q: Do I need rigid duct for the entire run? A: For performance and safety, rigid metal is recommended for the main run. A short semi-rigid connector may be used at the dryer.
Q: How do I avoid crushing the duct behind the dryer? A: Plan the outlet alignment carefully and use a short, safe transition. Move the dryer back into place slowly, checking for kinks or pinches.
Q: What if my existing vent runs into a crawlspace? A: Reroute to the outdoors as soon as possible. Venting into enclosed spaces causes moisture problems and creates hazards.
Q: How can I verify good airflow? A: During operation, the exterior damper should open fully and exhaust should feel strong. Listen for vibration and check for leaks at joints; adjust supports or reseal as needed.
Making the choice with confidence
Dryer vent performance depends on route design, material quality, and careful commissioning. Kits can serve very short, simple paths when supplemented with better components and diligent testing. Complex routes, masonry penetrations, and roof terminations are best handled by specialists who can plan thoroughly and verify results. If you want an expert opinion or prefer to hand off the entire process, connect with a Somerville team that focuses on professional dryer vent installation and rest easy knowing the system is built for safety and reliability.
Take the next step for your Somerville home
Whether you are finalizing a DIY plan or ready to bring in experts, the objective is the same: a smooth, short, well-sealed path that exhausts outdoors with strong airflow. If you prefer an experienced hand to plan, install, and verify every detail, schedule a visit with a trusted local provider of dryer vent installation services and enjoy efficient, worry-free laundry days.
