
Somerville, New Jersey homeowners know that comfort and air quality go hand in hand. When ducts leak, sag, or lose insulation, conditioned air drifts into attics and basements instead of your living spaces, and dusty air sneaks in through returns. The goal of this guide is to give you a complete, practical roadmap to restoring your ductwork—so your system runs smoother, your rooms feel balanced, and your family breathes cleaner air. From first inspection to final verification, you will learn what to look for, what to fix, and when to call in professional air duct repair for the tough issues.
Why Duct Repair Matters in Our Climate
Somerville’s seasonal extremes put stress on duct materials and connections. Summer humidity can weaken tapes and encourage microbial growth when condensation forms. Winter’s dry air intensifies shrinkage, loosening seams and joints. By proactively sealing, supporting, and insulating your ducts, you protect airflow, reduce temperature swings, and extend the life of your HVAC equipment.
Recognize the Warning Signs
- Uneven temperatures: Some rooms run hot in summer or cold in winter, despite thermostat settings.
- Dust and allergens: Increased dusting, aggravated allergies, or dirty vents suggest leaky returns or boot-to-drywall gaps.
- Noisy operation: Whistling at seams or rattling from poorly supported runs.
- Frequent filter changes: Clogged filters may indicate return leaks pulling contaminants from attics or wall cavities.
Essential Tools and Materials
- UL 181 metal-foil tape and mastic sealant designed for ducts.
- Sheet metal screws, hanger straps, cable ties, and couplers for flexible duct repair.
- Utility knife, tin snips, screwdrivers, measuring tape, flashlight, and a headlamp.
- Insulation sleeves/wraps and vapor-seal foil tape to restore R-value.
- Optional smoke pencil or incense stick to reveal airflow at seams.
Survey Your Duct System
Start at the air handler, then follow the supply trunk and branches to each register. Repeat for the return side. Mark any separated joints, missing tape, torn flexible ducts, crushed sections, and weak supports. Look for condensation stains that hint at thermal problems or airflow imbalances. Photograph problem areas so you can compare before-and-after results.
Seal the Obvious Leaks First
- Clean joints and seams of dust and old tape residue.
- Re-seat loose fittings and reinforce with sheet metal screws at regular intervals.
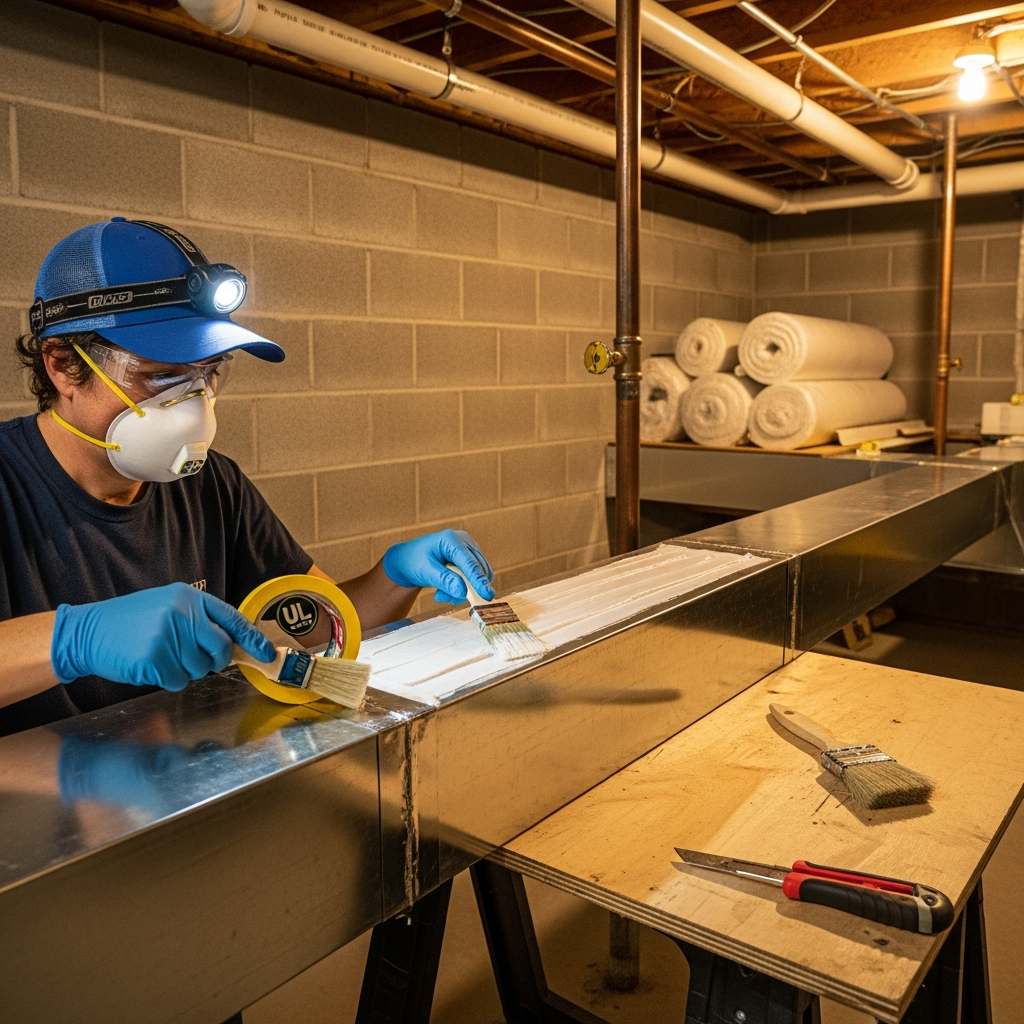
- Brush on mastic to all seams, screws, and takeoffs. Aim for a continuous, thick layer.
- Apply UL 181 foil tape over mastic and press down to eliminate ridges where air could travel.
- At boots, seal the boot-to-drywall gap to prevent wall-cavity air from bypassing your filter.
Repair Flexible Ducts
- Expose the inner liner by pulling back insulation and the outer jacket.
- Trim torn or crushed sections cleanly; use couplers to splice if needed.
- Slide the inner liner over the collar, secure with a clamp or zip tie, and add a few short screws if appropriate.
- Seal with mastic and UL 181 foil tape, ensuring full coverage.
- Pull insulation and jacket back into place, then tape and clamp to complete the vapor barrier.
- Support every few feet with wide straps, keeping bends broad and smooth to limit turbulence.
Insulate for Somerville’s Seasons
Even perfectly sealed ducts waste energy if they run bare through unconditioned spaces. Restore or upgrade insulation, paying close attention to attic and crawlspace runs. Verify that seams are tight, jackets are intact, and there is no compression that would reduce R-value. Insulation is your shield against heat gain, heat loss, and condensation.
Mid-Project Checkpoint
Before you button everything up, pause for a performance check. Turn on the fan and feel for leaks around the areas you just sealed. Adjust dampers if you have them and make note of rooms that still feel weak. If you uncover structural issues, persistent negative pressure on the return side, or suspect contamination inside the ducts, a qualified team offering comprehensive air duct repair services can complete advanced diagnostics and balancing.
Balance, Test, and Verify
Air distribution is as important as sealing. After repairs, set dampers to neutral, then fine-tune room by room. Listen for faint whistling that signals a missed pinhole. If you have a basic manometer, measure static pressure across the system; healthier numbers typically fall within the equipment’s specifications and reflect smoother, less restricted airflow. Record the final settings so you can quickly restore balance after seasonal filter changes or maintenance.
Common Pitfalls to Avoid
- Using cloth tape: It dries and fails, inviting leaks back in short order.
- Neglecting returns: Leaky returns degrade air quality and strain the blower.
- Crushing flex with tight straps: Restriction here can defeat all your other repairs.
- Leaving boot gaps: This sneaky bypass robs rooms of conditioned air and increases dust.
Maintenance Habits That Pay Off
Replace filters on schedule to protect your blower and coil. Keep furniture and drapes clear of registers and returns. After storms, peek into the attic or basement for moisture signs that may degrade insulation or tapes. Every spring and fall, do a light inspection of visible ducts, supports, and key joints to catch small problems before they grow.
FAQ
Q: How long do typical duct repairs last? A: When you use mastic and UL 181 foil tape correctly, repairs can last for many years, especially if the ducts are well supported and insulated.
Q: Do I need special tools to balance airflow? A: You can start with simple damper adjustments and observation. For precise results, professionals use instruments to measure pressure and flow.
Q: Are there health benefits to sealing returns? A: Yes. Tight returns help keep dust, insulation fibers, and outdoor pollutants from being pulled into the system.
Q: Can I seal ducts in wall cavities? A: Focus on accessible trunks, branches, and boot-to-drywall gaps. Professionals may offer solutions for concealed leaks depending on your home’s layout.
Q: What if my ducts are noisy after repair? A: Rattling often points to loose supports, while whistling suggests a small leak. Re-check your fasteners and seals.
Q: Should I insulate returns and supplies? A: Any duct traveling through unconditioned space benefits from insulation to reduce thermal loss and condensation risk.
Restore Comfort and Confidence at Home
You can make a substantial impact on comfort and air quality with careful sealing, support, and insulation. For complex layouts, limited access, or stubborn airflow problems, partner with a local expert who can test and tune the whole system. When you are ready for dependable results backed by Somerville know-how, choose proven air duct repair to protect your home and the people in it.
