
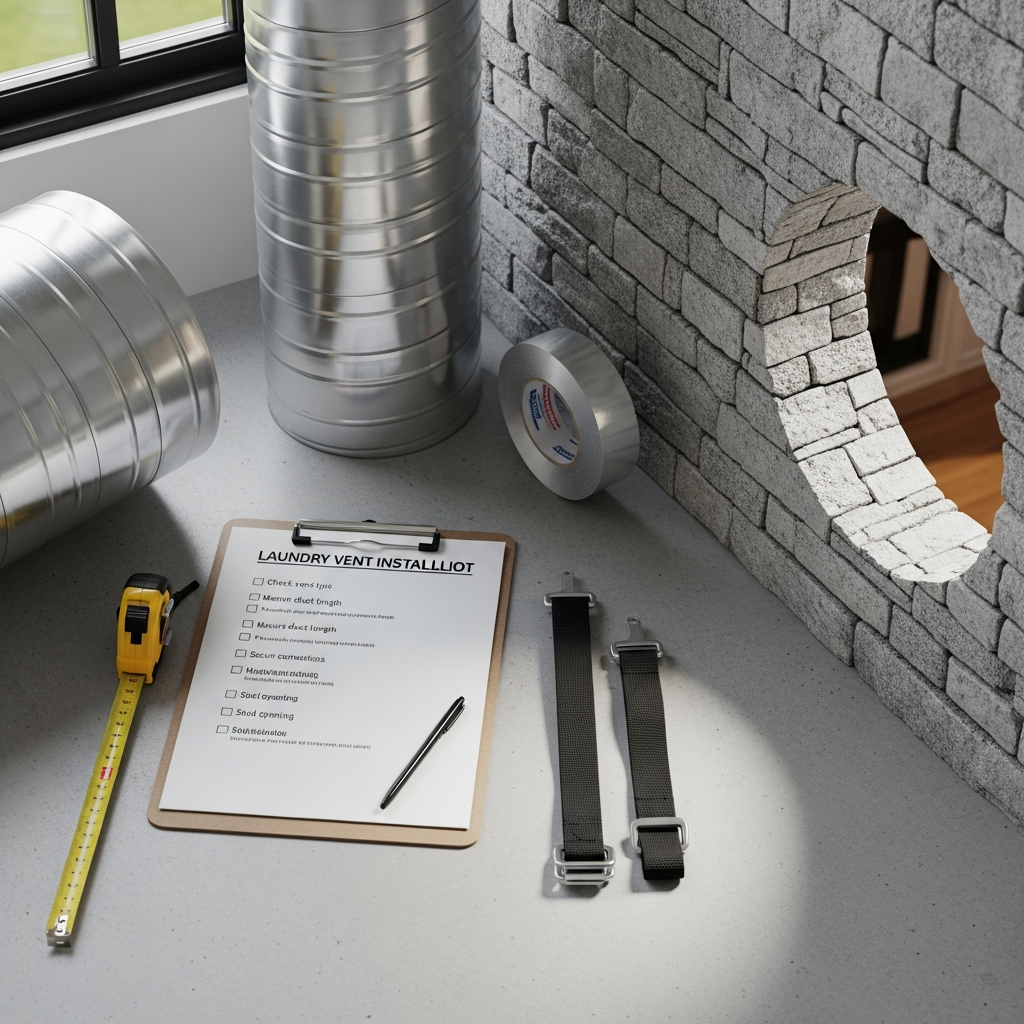
A clear, thorough checklist transforms dryer vent installation from an uncertain chore into a confident, code-aligned project. In Somerville, New Jersey—where homes range from classic brick facades to newer townhomes—every residence benefits from a vent system that is short, smooth, secure, and easy to maintain. This requirements checklist distills core best practices and local considerations into an actionable reference you can use during planning, installation, and final verification. If at any point you prefer hands-on guidance or want a turnkey solution, consider scheduling professional dryer vent installation to ensure each box on your list is checked with expertise.
Before diving into details, keep the big picture in mind: move air efficiently, contain lint, protect the building from moisture, and design with maintenance in view. The items below will help you achieve those goals consistently, whether you are upgrading an older run or building a new laundry layout.
Planning and design
- Confirm dryer specifications. Identify the required duct diameter—commonly 4 inches—and the maximum equivalent length for your specific model.
- Map the shortest practical route to the exterior. Favor straight runs with minimal elbows; consider relocation of the dryer if the path is otherwise excessive.
- Choose approved materials. Plan on smooth rigid metal for main runs and a listed semi-rigid transition at the appliance.
- Account for maintenance access. Design the route so future cleaning can be performed from the termination and/or appliance end without opening finished walls.
- Identify framing and utilities. Use a stud finder and visual inspection to avoid conflicts with wiring, plumbing, and structural members.
Openings and terminations
- Select a termination location with proper clearances from windows, doors, decks, and mechanical intakes. Aim for easy access for cleaning.
- Use a hood with a functional backdraft damper and no screen. Confirm the damper moves freely and is not painted shut.
- Cut clean, properly sized openings. For masonry, use suitable tools and anchors; for siding, use a mounting block where appropriate for a flat, weather-tight surface.
- Seal penetrations against air and water with compatible exterior sealant or flashing as needed.
- Mount the termination high enough to remain above typical snow accumulation and away from areas where lint can collect, such as beneath decks.
Duct assembly
- Use smooth rigid metal duct for main runs. Avoid plastic or unlisted flexible products for these sections.
- Keep the run as short and straight as possible. Reduce the number of elbows and prefer gentle turns over tight bends.
- Assemble with correct orientation. Seat crimped ends so airflow follows seams without creating turbulence.
- Seal joints externally with UL- or HVAC-rated foil tape. Do not use screws that protrude into the airstream.
- Support the duct with hangers or straps at consistent intervals to prevent sagging.
- Insulate sections in unconditioned spaces to minimize winter condensation.
Dryer connection
- Install a listed semi-rigid transition connector between the dryer and the wall outlet. Keep it short and free of kinks.
- Consider a recessed dryer vent box to prevent crushing the connector and to save space behind the appliance.
- Position the dryer with enough clearance so the connector is not pinched when the appliance is pushed back.
Testing and verification
- Run the dryer and confirm the exterior damper opens fully and consistently.
- Check for air leaks at joints using your hand or a smoke pencil. Reseal as needed with foil tape.
- Verify that drying times are reasonable and that the laundry room does not overheat or become excessively humid during operation.
Somerville-specific considerations
- For basements, strap ducts high and plan a route that does not impede access to mechanical equipment or storage.
- Where ducts pass through unconditioned spaces, insulate to reduce condensation that can form during winter months.
- On masonry exteriors, use appropriate anchors and ensure the termination flange seats flush and sealed against the wall.
- On vinyl or fiber cement siding, install a mounting block to create a stable, weather-tight base for the hood.
- In tight side yards, position the termination to avoid exhausting toward walkways or neighboring windows, and to reduce lint streaking on siding.
Maintenance and safety
- Plan periodic cleaning—annually or biannually depending on use—to remove lint from elbows and long horizontal runs.
- Inspect the termination seasonally to ensure the damper moves freely and debris is not obstructing it.
- Clean the dryer’s internal lint trap every cycle and the cavity behind the lint screen periodically per manufacturer guidance.
- Watch for warning signs: longer drying times, overheating in the laundry area, or visible lint accumulation around the termination.
Mid-project quality checks
In the middle of installation, pause for a checklist review. Verify that elbow counts still fit within the dryer’s equivalent length limit, that all joints are fully seated and taped, and that supports are placed to prevent dips. Confirm the termination’s location and height relative to windows, grade, and landscaping. If any part of the plan is unclear—especially in older Somerville homes with tricky framing—invite an expert who regularly performs dryer vent installation to validate key decisions before walls close or caps are fixed permanently.
Frequently asked questions
Q: What duct size is required? A: Most standard dryers use a 4-inch diameter duct. Always confirm with your specific appliance manual.
Q: Can I vent the dryer to a crawlspace or garage? A: No. Dryer exhaust must terminate outdoors with a dampered, screen-free hood.
Q: Are roof terminations acceptable? A: Yes, if a dryer-rated roof cap is used and flashed properly. Many homeowners prefer wall terminations for easier access.
Q: How often should the vent be cleaned? A: Annual or biannual cleanings are common. Longer or more complex runs, or heavy laundry usage, may warrant more frequent service.
Q: What signs indicate a problem? A: Long drying times, a hot laundry space, musty odors, or visible lint at the hood suggest restrictions or leaks.
Q: Do I need to insulate the duct? A: Insulation helps prevent winter condensation in unconditioned spaces and is recommended in many Somerville installations.
Make your checklist a success
When each requirement on this list is addressed, your dryer will exhaust efficiently, your laundry area will stay safer and cleaner, and long-term maintenance will be simpler. If you want a fast, reliable path to completion, book professional dryer vent installation and let trained specialists deliver a well-routed, sealed, and documented system from day one.
