
Understanding dryer vent installation code helps Somerville, New Jersey homeowners design safer, more efficient laundry systems. While local jurisdictions adopt specific versions of model codes and may add amendments, the broad principles are stable: use the correct materials, keep the run short and smooth, avoid screens at the termination, and respect manufacturer limits on equivalent length. Getting these elements right reduces fire risk, improves airflow, and protects your home’s structure from hidden moisture. Whether you are renovating a basement laundry, relocating a washer-dryer to an upstairs closet, or replacing an outdated flex hose, a grounding in code expectations will guide smarter choices. If you prefer hands-on help interpreting and applying these requirements, consult a Somerville specialist in dryer vent installation who can review your layout and verify compliance.
Code language can be technical, and local enforcement practices vary, so it is wise to confirm specifics with your municipality or a licensed professional before work begins. Still, the essentials translate well to everyday planning. The following sections outline common requirements and best practices associated with modern residential dryer venting.
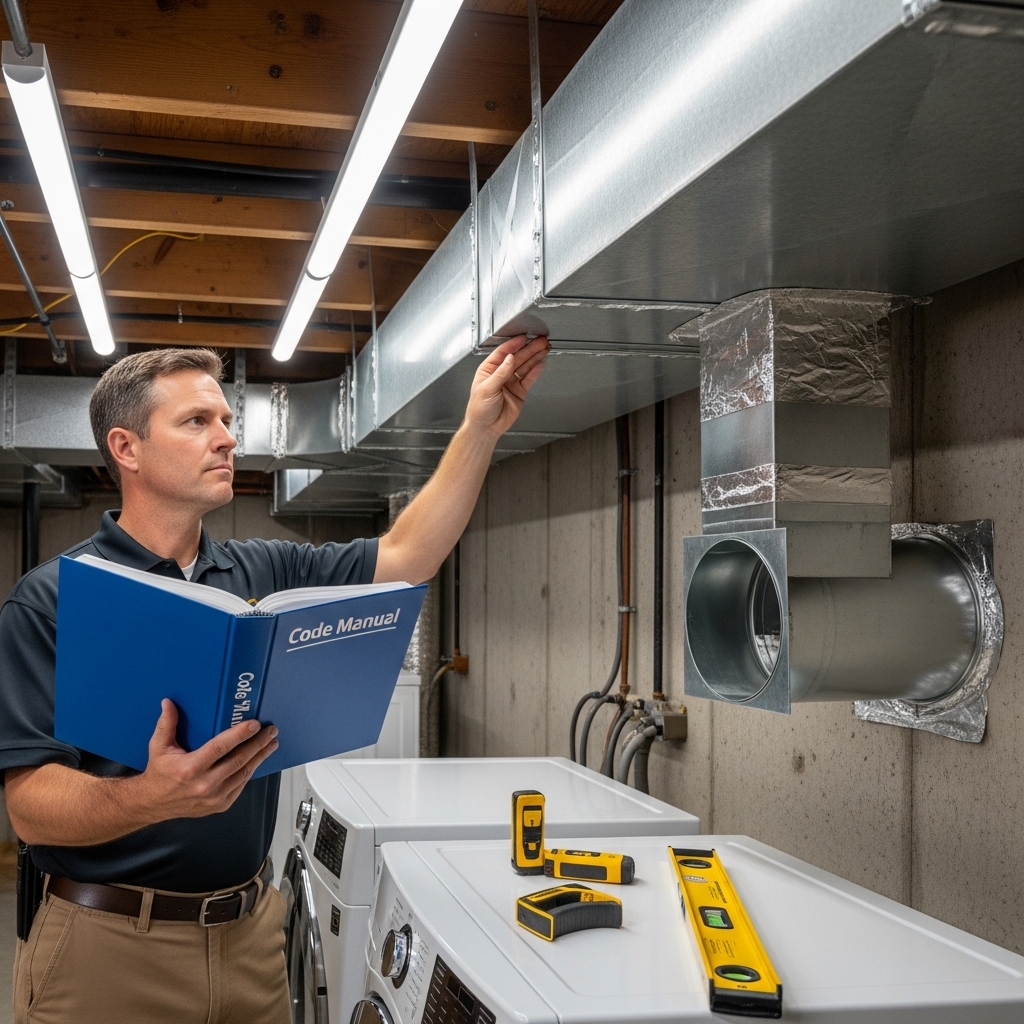
Approved materials and sizing
Most residential dryers are designed for 4-inch round ducting. Smooth-walled rigid metal is generally the prescribed material for main runs because it promotes airflow and resists heat and crushing. A short, listed transition connector—often a semi-rigid metal—may be used between the dryer and the fixed duct. Plastic or thin foil accordion-style products are typically not approved for main runs because they trap lint and can degrade under heat.
Where ducts pass through concealed spaces, use continuous, rigid sections with sealed joints. Fasteners that penetrate the airstream are discouraged because they collect lint. Instead, joints should be secured by mechanical fit and sealed externally with UL- or HVAC-rated foil tape. The overarching goal is a smooth interior, tight exterior, and a path that stays put over time.
Length limits and equivalent length
Code and manufacturers both impose limits on total run length. Because elbows add resistance beyond their physical distance, they are assigned “equivalent length” values that must be included in your total. For example, a 90-degree elbow might count as several feet of straight duct for calculation purposes. The exact values vary by appliance; always consult the dryer’s installation manual for the authoritative limit and fitting equivalents. If your proposed route exceeds the allowed equivalent length, revise the path—reduce elbows, shorten runs, or relocate the dryer if necessary.
Why do these limits matter? Poor airflow leads to long drying times, higher energy use, overheating inside the dryer, and increased lint accumulation. Over time, this can stress components and heighten safety risks. In short: shorter, straighter, smoother routes aligned with manufacturer limits are central to safe, compliant installations.
Terminations: dampered, not screened
An exterior hood with a backdraft damper is standard. Screens are not permitted because they trap lint and restrict airflow. The termination should be located outdoors—not in a garage, attic, crawlspace, or any concealed space—and must be positioned to avoid recirculating moist air into the home. Keep clearances from doors, windows, and mechanical air intakes. Where snow accumulates, mount the hood high enough to remain unobstructed in winter.
The damper must open freely under dryer exhaust and close when idle to block pests and drafts. Inspectors commonly check that the damper is free of paint overspray and debris. In Somerville’s climate, proper flashing and sealant are also essential to keep water out of the building envelope at the penetration.
Support, protection, and routing
Ducts should be supported at regular intervals so they cannot sag, which would collect moisture and lint. In basements and utility spaces, hangers or straps keep the run secure and accessible for cleaning. Where the duct passes through framing, use protective measures as needed to guard against nail or screw penetration. Maintain manufacturer-recommended clearances from combustibles, and avoid sharp bends that pinch flow.
Roof venting is acceptable when the route demands it, provided the roof cap is designed for dryers and flashed to code. Many homeowners prefer wall terminations because they are easier to service, but either can be compliant when installed correctly. Regardless of exit type, ensure the termination remains accessible for cleaning and inspection.
Prohibited practices
- Using plastic or unlisted flexible duct as a main run.
- Installing a screen at the termination hood.
- Ventilating into crawlspaces, attics, garages, or interior spaces.
- Exceeding the dryer manufacturer’s equivalent length limit.
- Using screws that project into the duct interior and snag lint.
- Creating sagging runs that trap condensation or lint.
Manufacturer instructions control
Even when you follow code, the manufacturer’s installation instructions are the definitive guide for your specific dryer. Codes often defer to these instructions for duct sizing, maximum equivalent length, and transition connector types. Because appliance designs and fans differ, two dryers may have different allowable run lengths or elbow equivalencies. Keep the installation manual on hand during planning and installation, and document your final route for future reference and inspections.
Special conditions in Somerville homes
Somerville’s mix of older homes and newer builds creates unique venting scenarios. For masonry exteriors, use appropriate anchors and ensure the hood’s flange and sealant seat flat against brick or stone. For vinyl siding, a mounting block creates a stable, weatherproof surface. In basements, strap ducts high and insulate where they pass through unconditioned zones to minimize condensation in winter. For second-floor laundry closets, confirm that vertical risers are feasible within joist bays and that roof penetrations are properly flashed with dryer-rated caps.
Where lot lines are tight, position terminations to avoid exhausting toward patios, walkways, or neighbor windows. Aim for locations that minimize lint streaking on siding and allow safe ladder access for cleaning. The best compliance plan is one that also simplifies maintenance.
Inspections, permits, and documentation
Depending on scope, your project may require a permit and inspection. A clear plan, material list, and route drawing help streamline approvals. After installation, keep records that show duct length, elbow counts, and materials used. Photos of concealed runs taken before walls are closed can be invaluable for future maintenance and for satisfying buyer questions at resale.
During inspection, expect verification that materials are appropriate, joints are sealed, the termination is dampered and screen-free, and that the run appears to match the documented route. If the inspector requests changes, address them promptly; small adjustments—like swapping elbows or re-seating a hood—can make a significant difference in measured performance.
Mid-project compliance checks
Before closing walls or finalizing the exterior termination, pause for a compliance check. Confirm that you have not exceeded the dryer’s maximum equivalent length, that joints are fully taped with listed foil tape, and that supports are spaced appropriately. Validate that the termination location maintains clearances from windows and intakes. If you want added assurance, request a mid-install review from a local expert in dryer vent installation who can verify details on the spot.
Frequently asked questions
Q: Does code require a specific duct diameter? A: Most dryers require a 4-inch duct, but always verify with the appliance manual, which controls the final specification.
Q: Are roof terminations allowed? A: Yes, provided a dryer-rated roof cap is used and properly flashed. Wall terminations are often simpler to maintain but are not mandatory.
Q: Can I use screws to secure joints? A: Avoid fasteners that penetrate the duct interior. Use tight-fitting joints and HVAC-rated foil tape on the exterior of seams.
Q: Is a screen required to keep pests out? A: No. Screens are prohibited because they trap lint. Use a hood with a functioning backdraft damper.
Q: How far from a window must the termination be? A: Follow local clearance rules and manufacturer guidance; keeping exhaust away from doors, windows, and intakes is the guiding principle.
Q: Do I need to insulate the duct? A: Insulation is recommended where ducts pass through unconditioned spaces to reduce condensation, particularly in winter.
Your next step toward compliance
If you are planning a new laundry layout or correcting an outdated vent, align your project with code and manufacturer guidance from the outset. For a streamlined, compliant result backed by professional know-how, arrange expert dryer vent installation and enjoy a safer, more efficient home.
