
Dryer Vent Cleaning After Installation: A Somerville, New Jersey Homeowner’s Guide
New dryer or new venting installed? Congratulations—this is the perfect time to set your system up for long-term safety and efficiency. Even brand-new installations can contain leftover construction debris, metal shavings, or packing lint that restricts initial airflow. A careful post-installation check and cleaning ensures a clean slate so your appliance operates exactly as designed. For the best results, pair your first inspection with professional dryer vent cleaning to verify every component of the exhaust path before you run your first full load.
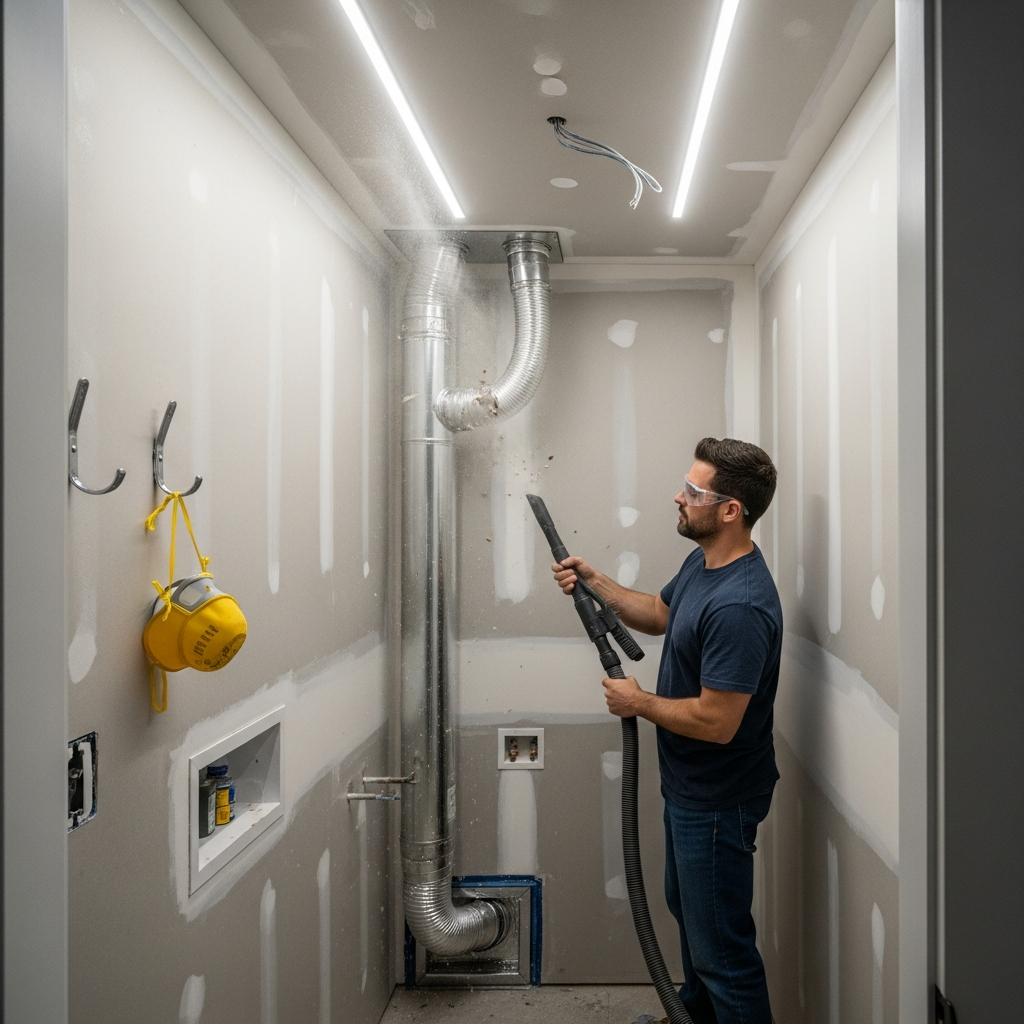
Why Post-Installation Cleaning Matters
During construction or appliance replacement, dust and fine debris can enter open ducting. Installers may cut new rigid sections, add elbows, or reroute the termination, leaving metal fragments that snag lint from day one. Even if your contractor did a careful job, the transition duct can be compressed when the dryer is pushed back into position, reducing performance and contributing to early buildup. A post-installation cleaning removes contaminants and confirms that your new setup meets best practices.
Immediate Steps After a New Dryer or Vent Installation
- Visual checks: Confirm that the transition duct is short, smooth, and not crushed behind the dryer. Verify clamp tightness at both ends and look for foil-backed tape—never cloth duct tape—on permanent joints.
- Exterior termination test: Start the dryer on a timed heat cycle and observe the hood. The damper should open widely with a steady exhaust flow. If movement is weak, stop and investigate.
- Baseline airflow reading: If available, have a technician record initial airflow or back-pressure. This benchmark helps track performance over time.
- Initial cleaning pass: Run a light professional cleaning to remove construction debris and ensure joints remained intact through installation.
- Documentation: Note the vent route, number of elbows, and termination type, plus the date and any measurements. Keep this with your appliance manual.
Best Practices for Vent Materials and Routing
- Use rigid metal ducting for the permanent run with smooth interiors to minimize lint trapping.
- Limit elbows and avoid unnecessary length. Each turn adds resistance and invites buildup.
- Keep the transition duct as short and straight as possible with a UL-listed material sized to the outlet.
- Avoid screws that penetrate into the airstream. Use proper clamps and foil-backed tape for sealing.
- Position the dryer to leave clearance behind the unit and prevent crushing the connector.
Common Post-Install Issues to Catch Early
- Kinked or overly long transition duct because the appliance alcove is shallow.
- Poorly seated joints that leak air and lint into wall cavities or laundry rooms.
- Exterior hood that sticks, is painted shut, or is partially blocked by siding or trim.
- Debris in the vent from drywall, sawdust, or roofing projects completed near open duct ends.
- Improper terminations that include screens which rapidly clog with lint.
Set Your Maintenance Cadence From Day One
Once your new dryer and vent are verified, establish a service schedule tailored to your household. Single-occupant homes with light use may only need annual cleanings, while busy families, pet owners, or homes with long vent runs may need service every six to nine months. A predictable cadence keeps airflow strong and prevents performance drift from creeping in unnoticed.
Testing Your System the Smart Way
After installation and the initial cleaning, run a series of test loads to confirm stability. Start with a small mixed-fabric load on a normal cycle. Note how long it takes and how the exterior damper behaves. Move on to heavier towels or bedding, then compare times and results. Keep records; your baseline will make it easy to recognize changes that signal it is time for service.
Seasonal Considerations for Somerville
Somerville’s winter cold can stiffen dampers and accentuate back-pressure. Summer humidity makes exhaust air heavier and more moisture-laden, which increases the importance of clear venting. Spring pollen and fall leaves can accumulate around terminations. Build quick exterior visual checks into your seasonal routines, and plan your cleaning before the heavy laundry periods that accompany school-year starts and holiday hosting.
Mid-Year Checkup: Keep Performance on Track
Even if you installed everything recently, consider a mid-year review. Confirm that the dryer still has rear clearance, the transition duct remains round and intact, and the exterior hood opens fully. If towels begin taking longer to dry, do not assume the appliance is at fault—minor vent restrictions can develop quickly. When in doubt, schedule professional dryer vent cleaning to clear obstructions and recalibrate airflow.
What to Document for Future Service
- Vent route details: locations of elbows, vertical rises, and concealed segments.
- Measurements: baseline airflow or back-pressure where available.
- Dates: installation, first cleaning, and every subsequent service.
- Observations: typical cycle times for different load types and any unusual odors or noises.
Frequently Asked Questions
Q: Do new vents really need cleaning? A: Yes. Construction residue and metal fragments can linger inside even brand-new ducting. An initial pass removes debris and helps verify joint integrity.
Q: How soon after installation should I schedule the first cleaning? A: Ideally within days or weeks of installation, combined with baseline testing. After that, follow your tailored maintenance cadence.
Q: My new dryer still takes too long—what now? A: Verify the transition duct is not crushed, confirm damper movement outside, and have airflow measured. If readings are low, a cleaning and layout review can pinpoint the restriction.
Q: Are rooftop terminations okay for new installations? A: They can be, provided the cap is designed for dryer exhaust, is accessible for service, and does not include a screen that traps lint.
Q: Will post-install cleaning void my warranty? A: Routine maintenance that follows best practices helps protect your investment and supports proper operation; keep documentation for your records.
Q: Can I run flexible plastic ducting behind the dryer? A: Avoid plastic. Use a UL-listed semi-rigid or smooth-walled connector sized for your dryer outlet.
Keep Your New Setup Running at Its Best
Start strong and stay safe with a clean, verified vent system. If your installation is recent—or if you have noticed even small performance changes—book trusted local dryer vent cleaning and enjoy confident, efficient drying from day one.
