
When deciding between a DIY dryer vent cleaning kit and a professional service in Somerville, New Jersey, it helps to understand what each option can realistically accomplish and where the limits are. The goal is not just to remove some lint; it is to restore safe, efficient airflow from the dryer to the exterior termination. That requires clearing the entire vent path, protecting indoor air quality during the process, and verifying results. For many homeowners, the right choice depends on vent length, number of elbows, where the termination is located, and how comfortable you are moving the appliance and working with tools. To get a clear picture of your system’s needs and options, consider arranging local dryer vent cleaning so you can weigh DIY efforts against a professional evaluation.
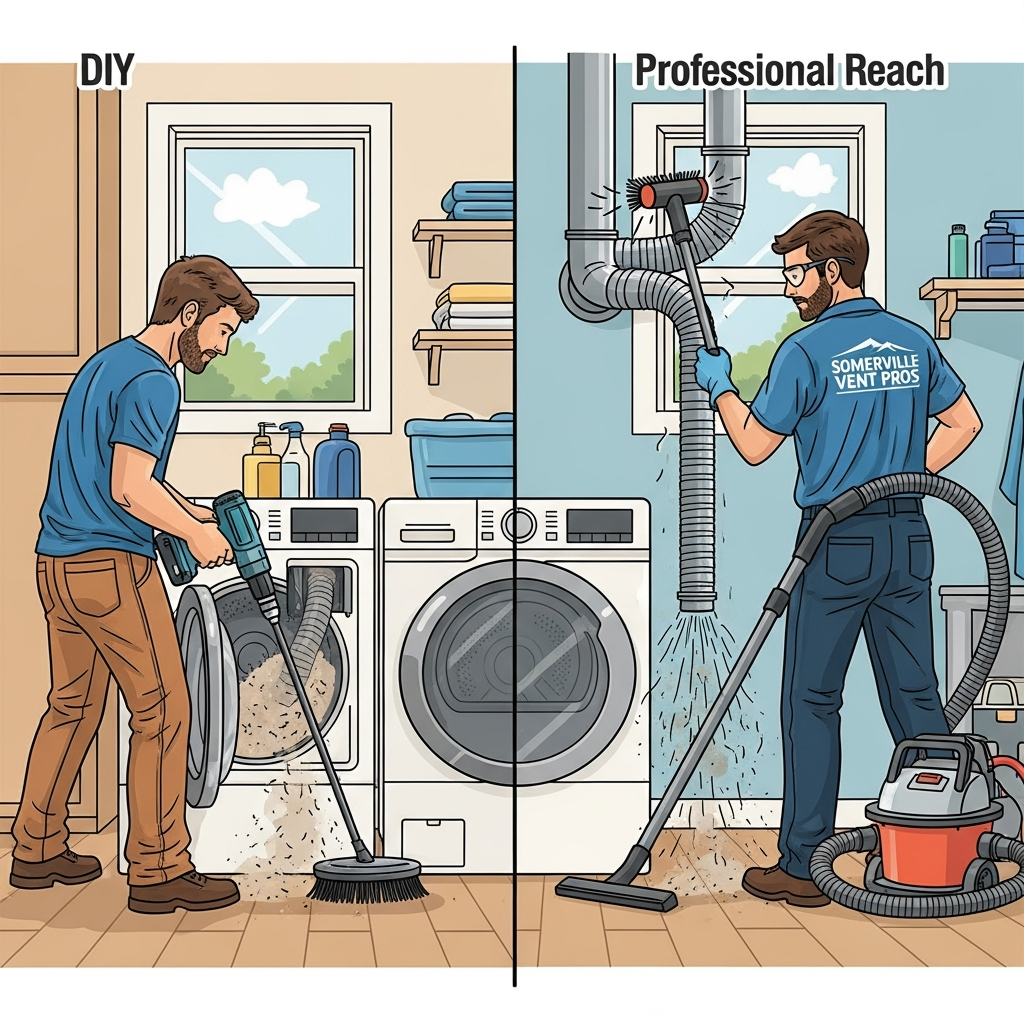
What a DIY kit can do well
Most retail kits include flexible rods and a brush that attaches to a drill. On short, straight runs, these tools can dislodge loosely adhered lint and improve airflow. For homeowners who want to perform light maintenance between professional visits, kits can be useful for quick touch-ups, especially at the transition connector and the first several feet of ducting. A careful DIYer can also clean the lint screen housing, vacuum around the dryer, and confirm the exterior flap opens freely.
Where DIY kits fall short
- Limited reach on long runs and past multiple elbows where lint compacts most tightly.
- Reduced control and visibility inside the duct, increasing the chance of leaving pockets of debris behind.
- Risk of damaging thin foil or plastic ducting, or accidentally disconnecting joints inside walls.
- No integrated high-suction extraction, which can let loosened lint migrate farther into the system.
- No airflow measurement to verify performance gains.
What professional service adds
Professionals use rotary brushes, air whips, and high-powered vacuums designed to capture debris as it is dislodged, keeping your living spaces clean. They navigate elbows, offsets, and long horizontal sections more effectively and can access exterior terminations that are high or awkwardly placed. Technicians also assess installation materials, correct crushed connectors, and recommend improvements such as replacing noncompliant screws or upgrading to smooth interior metal ducting. Most importantly, they verify results with airflow readings before and after cleaning.
Somerville-specific considerations
Somerville homes range from historic structures with creative retrofits to townhomes with soffit or roof terminations. DIY access to these areas can be challenging and sometimes unsafe. Professionals are equipped for ladder work, tight basements, and shared chases in multi-unit buildings. They understand how wind exposure, snow, and wildlife can affect termination performance and will service those components accordingly.
Signs your vent needs more than a kit
- Drying cycles are getting longer, and clothes feel hot to the touch.
- There is visible lint around the exterior termination or the flap sticks.
- The dryer shuts off mid-cycle or shows overheating-related alerts.
- You suspect crushed sections, kinks behind the dryer, or interior screws.
- The vent path is long, includes several elbows, or terminates on a roof.
Safety and material choices
DIY or professional, safety starts with the right materials. Smooth interior metal ducting is preferred for the main run, and the connector behind the dryer should be short and crush-resistant. Joints should be sealed with approved foil tape or clamps, not screws that protrude into the airstream. If you discover noncompliant materials or a termination that uses a screen, plan a professional correction. These steps reduce lint traps and support steadier airflow.
Time, effort, and results
DIY projects demand time and a careful approach to avoid damaging components or spreading lint indoors. While a kit may improve airflow on simple vents, complex systems usually require professional tools and experience to achieve complete results. By the midpoint of your evaluation, if you are still unsure which path to take, consider scheduling reliable dryer vent cleaning services to gain data-driven insight, including airflow readings and recommendations tailored to your home.
Blended strategy: DIY between professional visits
Many homeowners pair light DIY maintenance with periodic professional service. Clean the lint filter every load, vacuum behind and around the dryer occasionally, and use a kit lightly on short, accessible sections. Then rely on professional service for thorough cleaning, verification, and any needed corrections. This approach balances effort, safety, and performance over time.
Frequently Asked Questions
Q: Can I push a DIY brush through multiple elbows safely? A: It depends on the duct material and rigidity. Flexible rods can navigate bends, but aggressive force risks separating joints or damaging thin ducting. Professionals use equipment designed to negotiate elbows while maintaining control and suction.
Q: How do I know if I reached the termination with my kit? A: You may feel the brush contact the flap or the rod may stop. Without visual access or airflow measurement, it is hard to confirm a complete clean. Professional verification ensures that the entire run is clear.
Q: Is it safe to run my drill at high speed? A: Moderate speeds are safer; high RPM can tangle rods or abrade duct walls. Many professionals use controlled torque and specialized heads to reduce risk while maximizing debris removal.
Q: What if my vent terminates on the roof? A: Roof terminations introduce height and safety concerns. It is best to leave those to trained technicians equipped with proper ladders, fall protection, and weather considerations.
Q: Will professional cleaning be disruptive? A: Reputable providers protect floors, contain dust, and work efficiently. They will move the dryer carefully and restore the space to a tidy condition.
Q: How often should I combine DIY and professional service? A: Many households benefit from annual professional cleaning, with light DIY touch-ups a few times per year depending on usage and vent complexity.
Steps for a careful DIY attempt
- Unplug the dryer (and shut off gas if applicable) and pull it forward gently.
- Inspect the connector for crushing, kinks, or tears; replace with a crush-resistant option if needed.
- Vacuum lint around the dryer, lint screen housing, and floor area.
- Attach the brush to the rods and drill, and feed gently into the duct, advancing slowly.
- Work in short passes to avoid binding; stop if you feel unusual resistance.
- Periodically withdraw the tool to remove debris and check progress.
- Reassemble carefully, avoiding sharp bends, and confirm the exterior flap opens freely.
Make an informed choice with local insight
Whether you start with a DIY kit or go straight to professional service, the outcome should be cleaner, safer, and measurably better airflow. Somerville’s range of home styles and vent configurations often tilt the balance toward professional help for complete results. If you want a clear, data-backed path forward, schedule professional dryer vent cleaning with a Somerville specialist who can handle the details and leave your system breathing easier.
