
Clear, practical dryer vent installation instructions help Somerville, New Jersey homeowners complete a project safely and effectively. Whether you are replacing an outdated, kink-prone hose or routing a new vent path during a remodel, the right steps protect your home and enhance dryer performance. The guide below outlines planning, materials, and procedures that align with widely accepted best practices. If you prefer expert support and a smooth, start-to-finish experience, you can schedule professional dryer vent installation to ensure your system is built and tested for reliable results.
Plan the Route
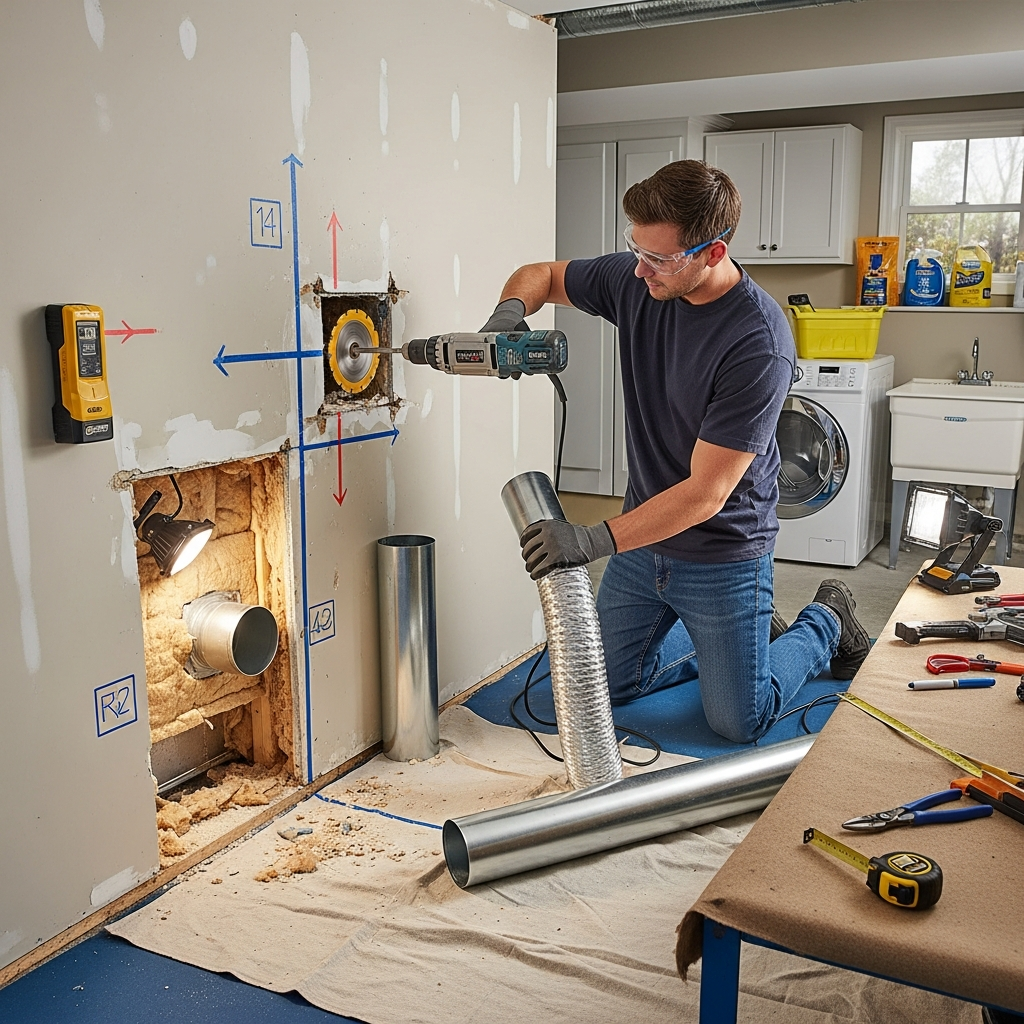
Start by identifying the most direct path from the dryer to the outdoors. A short, straight run with minimal elbows preserves airflow. When choosing a termination point, avoid locations that could be blocked by landscaping, snow, or architectural elements. Keep clearances from doors, windows, and utilities in mind, and plan for an exterior hood with a free-moving damper. If you must route through ceilings or long interior paths, consider how to minimize turns and support the duct to prevent sagging.
Gather Materials and Tools
- Rigid metal duct sections for the permanent run
- Semi-rigid metal transition connector for short, gentle bends behind the dryer
- Long-radius elbows to reduce resistance
- Exterior wall or roof hood with a damper (no screen)
- Foil-backed HVAC tape for sealing joints
- Supports or hangers for longer runs
- Appropriate saws, snips, drill, and measuring tools
- Protective gear and drop cloths to safeguard finishes
Prepare the Work Area
Unplug the dryer and, if gas-powered, shut off the gas supply according to the appliance manual. Move the dryer to create safe working space. Protect floors and nearby surfaces. Identify studs, plumbing, and wiring along the proposed path using a stud finder and careful inspection. When cutting openings, keep edges clean and sized to the duct and hood to ensure a snug fit.
Create the Wall or Roof Opening
For wall exits, drill a pilot hole to confirm the exterior location aligns with your plan, then cut a clean opening that matches the duct size and hood requirements. For roof exits, follow roofing best practices: cut a neat opening, install appropriate flashing, and ensure weatherproof integration under shingles or approved roofing materials. Position the hood so the damper opens freely and closes fully without obstruction.
Assemble the Duct Run
Dry-fit duct sections from the dryer outlet to the termination. Use the fewest elbows possible and select long-radius fittings for required turns. Ensure the route allows the dryer to be pushed back into place without crushing the transition connector. Maintain a gentle, appropriate slope as needed to discourage condensation. Support horizontal sections at regular intervals and avoid low points where moisture could accumulate.
Seal Joints and Avoid Internal Obstructions
Seal each joint with foil-backed HVAC tape. Do not use screws that penetrate the duct interior, which can snag lint and disrupt airflow. Confirm that each connection is tight and aligned. At the exterior hood, connect the duct so the damper opens fully when the dryer runs and closes when it stops. If you are replacing an old vent, remove outdated or damaged materials to prevent mixing incompatible parts.
Connect the Dryer
Use a short, appropriately sized semi-rigid metal connector from the dryer outlet to the wall duct. Cut the connector to length as needed, maintaining gentle curves. Avoid crushing or kinking when positioning the dryer. Leave enough space behind the unit for heat dissipation and to reduce vibration transfer to the duct.
Test Airflow and Operation
Restore power (and gas, if applicable) and run the dryer on a heated cycle. Check that the exterior damper opens freely and that you can feel a strong, warm exhaust stream. Listen for rattles that indicate loose joints or supports. Inside, confirm that the transition connector maintains its shape as the dryer runs and does not rub against sharp edges or obstacles.
Final Adjustments and Cleanup
Fine-tune the dryer’s position to prevent stress on the connector and verify that no tools, packaging, or debris remain inside the duct. Seal interior and exterior trims neatly and, for roof terminations, confirm flashing is integrated as intended. Label the vent path or keep a brief note with your home documents for future reference, especially useful during renovations or when selling your home.
Maintenance After Installation
Clean the lint screen before every load. Inspect the exterior hood seasonally to confirm free damper movement and remove any debris. Based on household usage, schedule periodic professional vent cleaning to maintain peak performance. If cycles begin to lengthen or the laundry room feels unusually warm or humid, arrange for an airflow evaluation to address issues early.
Safety Tips Specific to Somerville Homes
- Choose a termination point that avoids snow drifts and ice buildup in winter.
- Use robust, weather-resistant exterior hoods that can withstand temperature swings.
- Protect finished spaces by planning careful access for runs through ceilings or walls.
- Avoid terminating near dryer make-up air sources or areas where exhaust could be drawn back inside.
Troubleshooting Common Issues
If your dryer still runs hot or takes too long to dry after installation, inspect for hidden kinks, crushed sections, or elbows that are too tight. Verify that the exterior damper opens fully and is not obstructed by paint, caulk, or debris. Ensure that joints are airtight and that the run uses the fewest necessary turns. If the run is unusually long, re-evaluate the route to shorten it where possible. In some cases, relocating the dryer or choosing a different termination point provides a better long-term solution.
Frequently Asked Questions
Q: What duct material should I use? A: Rigid metal for the permanent run, with a short semi-rigid metal transition behind the dryer, is a widely recommended approach for durability and airflow.
Q: Can I vent into a crawlspace or attic? A: No. Always vent outdoors. Discharging moist, lint-filled air indoors can damage building materials and create hazards.
Q: How do I handle tight spaces? A: Periscope-style metal connectors provide low-profile pathways that maintain clearance without crushing.
Q: How many elbows are acceptable? A: Use as few as possible and choose long-radius fittings. Each added turn increases resistance.
Q: Do I need special sealing products? A: Yes. Use foil-backed HVAC tape rated for temperature and moisture. Avoid cloth duct tape.
Q: Why avoid screws in duct joints? A: Screws protrude into the airstream, catching lint and reducing airflow. Proper fittings and tape create secure, smooth joints.
Q: What indicates good airflow? A: With the dryer running, the exterior damper should open cleanly, and you should feel a steady, warm exhaust stream.
Q: When should I seek professional help? A: If the path is long, passes through finished spaces, or requires roof termination, a pro can ensure a safe, efficient outcome.
Bring Confidence to Your Project
A careful plan, quality materials, and step-by-step execution are the keys to a durable, efficient vent system. If you want a dependable outcome without guesswork, connect with a Somerville specialist who will assess your space, tailor the route, and verify results. Schedule professional dryer vent installation to protect your home, improve performance, and enjoy smoother laundry days.
