
When you search for dryer vent installation near me in Somerville, New Jersey, you are really looking for three things at once: safety, efficiency, and confidence that the job will be done correctly the first time. A high‑performing vent route keeps moisture and lint moving outside, protects the home from overheating risks, and helps your laundry dry faster. If you have been noticing long dry times, a musty laundry room, or heat buildup around the appliance, that is your signal to take action. Early in your research it helps to understand why professional dryer vent installation matters in a place like Somerville, where neighborhood homes range from historic properties to newer construction with different wall assemblies and venting paths.
Choosing local expertise ensures your installer understands Middlesex and Somerset County building norms, prevailing winds, and how New Jersey’s seasonal humidity affects dryer performance. The right pro considers the shortest feasible run, uses the correct rigid materials, and checks clearances behind the unit so the vent hose is not crushed. Together, those details add up to safer operation, quicker drying, fewer service calls, and equipment that lasts longer. This guide walks through what to know, what to expect, and how to prepare for a smooth, code‑compliant installation in Somerville.
Why local expertise in Somerville matters
Somerville neighborhoods feature a mix of single‑family homes, duplexes, and multi‑unit buildings. Each property type has a preferred vent route. For example, a townhouse with limited exterior wall exposure might need a vertical roof termination, while a ranch home may benefit from a short horizontal run out the sidewall. An experienced local installer will assess the home’s layout, the laundry room’s location relative to the building envelope, and any structural or exterior finish constraints that affect termination location.
Local familiarity also matters for practical reasons. Weather patterns influence where lint traps and screens at the exterior can clog faster. Snow drift zones and leaf buildup points are different from block to block. A Somerville professional knows where to avoid low eaves that trap wind‑borne lint, and how to angle terminations to minimize water intrusion. They also understand best practices for preventing wildlife intrusion with proper hoods and screens designed for dryer exhaust, not generic louvers.
Understanding dryer vent basics
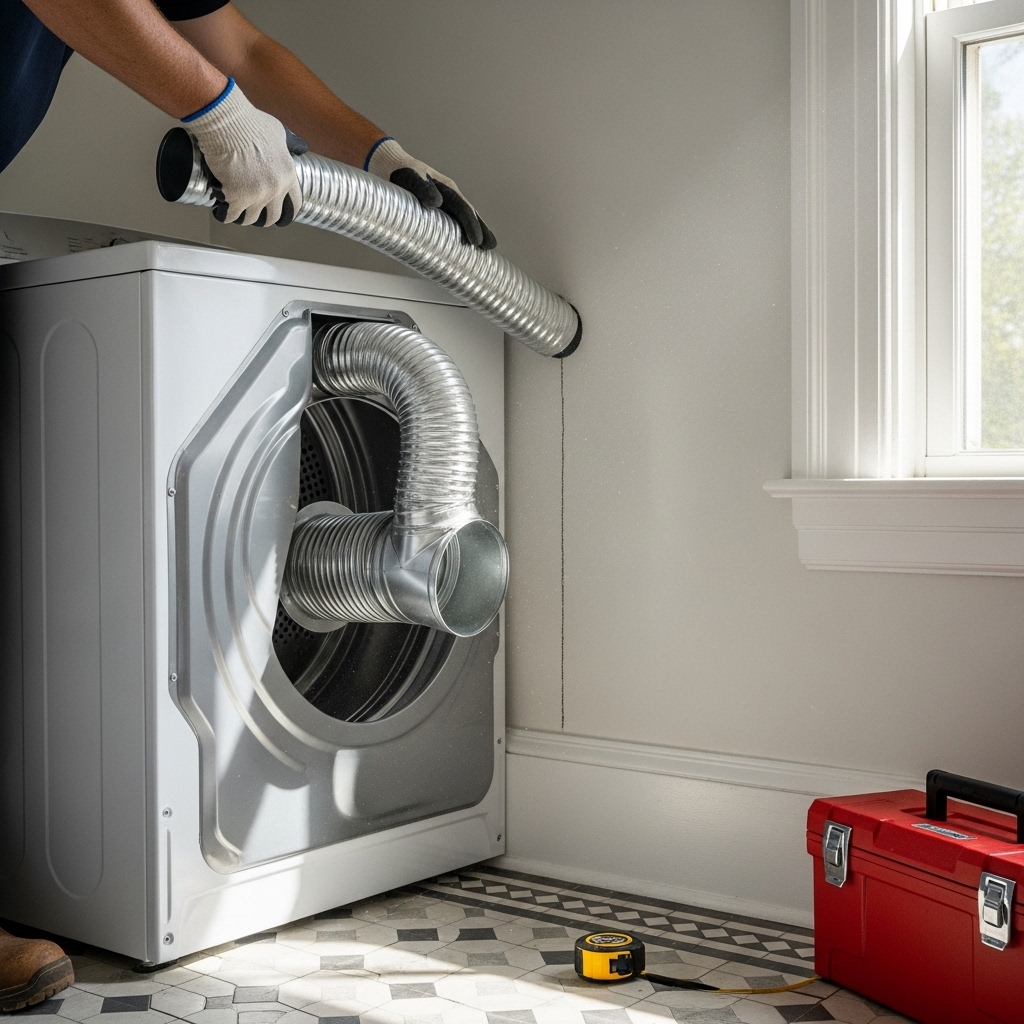
Dryers move warm, moist air out of your home through a vent pipe. The vent must be smooth on the inside to keep lint moving and to minimize static pressure that slows airflow. Rigid metal is preferred because it resists crushing and retains a smooth interior. The route should be as short and straight as possible, with gentle, necessary elbows that maintain radius and reduce turbulence. The exterior termination should open freely when the dryer runs and close when off, to limit drafts and pests.
When the vent is poorly designed, every function of your dryer suffers. Heat builds up, cycles run longer, and more lint accumulates where you cannot see it. Because lint is combustible, buildup raises risk over time. A proper installation keeps the duct slope correct, uses labeled dryer connectors rather than general HVAC flex, and avoids screws that protrude into the airstream where lint can catch.
Benefits of professional installation
- Performance: Correct routing and smooth interior walls allow your dryer to operate within its designed static pressure range, promoting faster drying and consistent results across loads.
- Safety: Reduced lint accumulation and lower exhaust temperatures help minimize overheating risks.
- Reliability: Secure joints and correct supports prevent disconnections behind walls and ceilings.
- Compliance: Work performed to relevant code and manufacturer instructions helps keep your home in good standing for insurance and resale inspections.
- Convenience: Professionals handle measuring, cutting, drilling, sealing, and testing in one visit.
What to expect during an installation visit
Most projects start with a visual assessment of the space around your dryer, including clearance behind the appliance, access to an exterior wall or roof, and the condition of any existing ductwork. The installer will measure the route, count elbows, and confirm they can reach a suitable termination point that meets safety and performance guidelines. If an old vent exists, they may remove non‑compliant components such as plastic flex or foil transition ducts and replace them with proper materials.
Next comes planning the penetration and routing. For a sidewall exit, the technician drills a pilot hole to verify that the selected location is clear of utilities and framing conflicts. They then cut the opening, install a backer if needed, and mount a proper hood that opens with airflow. For roof exits, the process includes flashing and sealing to protect against leaks. Inside, rigid duct sections are dry‑fitted, cut to length, and joined with foil tape rated for ductwork. The appliance connection uses a UL‑listed transition piece that maintains a smooth path and resists crushing when the dryer is pushed back.
Common mistakes to avoid
- Using thin plastic or foil flex as the main vent run. These materials can collapse, trap lint, and are not recommended for in‑wall or long paths.
- Allowing excessive length with multiple tight turns. Every sharp elbow increases pressure and reduces airflow.
- Ending the vent in an attic, crawlspace, or garage. Dryer exhaust must terminate outdoors.
- Securing joints with sheet‑metal screws that protrude into the airflow. Proper foil tape and approved connectors are preferred.
- Failing to provide adequate clearance behind the dryer, which can crush the connector and choke airflow.
Materials and code‑aligned practices
Quality installations rely on rigid, smooth metal ducting sized correctly for the appliance outlet. Joints are sealed with appropriate foil tape, not cloth duct tape, which degrades with heat and moisture. Supports are placed at proper intervals to prevent sagging, and the duct is routed with a subtle downhill slope toward the exterior to discourage condensation from collecting inside the system. At the termination, a back‑draft damper opens freely and closes when off, with a hood designed specifically for dryer use.
Somerville’s seasonal climate underscores the value of insulation in unconditioned spaces and the importance of ensuring the termination is accessible for cleaning. Cold air sits heavier in long vertical runs during winter, and a thoughtful design balances performance with maintenance access so that owners can keep the system clear between professional cleanings.
How to choose a local installer
- Ask about experience with your home type: historic homes, row homes, or newer subdivisions each present different routing challenges.
- Verify that the installer uses rigid metal duct wherever feasible and UL‑listed transition connectors.
- Request a clear description of the route length, number of elbows, and termination type they propose.
- Confirm that the visit includes airflow verification and a final operational test with your dryer.
- Ensure they provide guidance on maintenance intervals and how to access the termination for routine checks.
Preparation checklist for homeowners
- Clear a path from your entry to the laundry area to allow easy movement of tools and materials.
- Remove items stored on or around the dryer so the technician can pull it forward safely.
- Identify the likely exterior termination area and ensure ladders or access will not be blocked by vehicles or landscaping.
- Have the dryer model number handy so the installer can reference the manufacturer’s venting guidelines.
- Plan for a brief equipment test at the end, running a short cycle to confirm airflow.
When a new installation or replacement is needed
Several signals suggest it is time for a new installation. If your current vent path is excessively long, includes flexible sections hidden in walls, or terminates in an unsafe location, replacement is the right move. You may also notice laundry takes two or three cycles to dry, the laundry room feels unusually warm, or lint accumulates on the exterior hood more quickly than before. Another clue appears when your dryer’s moisture sensors misread damp loads, a sign that warm, moist air is not moving out effectively.
In older homes, remodels sometimes leave patched‑together vent segments that do not align well or seal tightly. Replacing piecemeal sections with a continuous, well‑supported run often delivers immediate performance improvements and greater peace of mind.
Midway reminder: get expert help
If you are weighing whether to tackle the work yourself or call a professional, consider the factors that matter most: clean airflow, robust sealing, and a tested, durable termination. A local expert who focuses on dryer vent installation will account for framing obstacles, existing utilities, and the ideal path that minimizes length and elbows, delivering a safer and more effective system.
Maintenance and ongoing care
After a proper installation, maintenance becomes simple and predictable. Homeowners should empty the lint screen every load, wipe the screen housing periodically, and visually inspect the exterior hood monthly to ensure the damper opens fully and no debris blocks the outlet. Seasonal checks are wise in autumn and spring, when leaves and pollen can accumulate around exterior openings. In households with heavy laundry usage, schedule professional cleanings at a cadence that matches your volume so that even a well‑installed system continues to exhaust freely.
Pay attention to changes in drying time or temperature around the laundry area. These clues often appear before larger issues, and quick attention keeps your dryer running efficiently. With a robust vent route and a simple maintenance routine, you will enjoy consistent results across fabrics and loads.
Frequently asked questions
How long does a typical installation take in a Somerville home? Most straightforward sidewall routes take a few hours because technicians must assess, drill or cut openings, run rigid duct, mount the exterior hood, seal joints, and test airflow. Complex routes with attic or roof transitions take longer due to access and sealing steps.
What materials are best for the main vent run? Rigid metal duct with a smooth interior is generally preferred. It maintains shape, resists crushing, and supports efficient airflow. The short connector between the dryer and the rigid duct should be an approved transition piece that does not kink when the appliance is pushed back.
Can the vent exit through the roof? Yes. Many Somerville townhomes and interior laundry rooms rely on a roof termination. The key is proper flashing, weather sealing, and accessible placement for periodic inspections.
How often should the vent be cleaned after installation? Frequency depends on laundry volume, pet hair, and the route’s length. A well‑installed system still benefits from periodic professional cleaning, especially if dry times increase or the exterior damper does not open fully.
What are signs of an undersized or poorly routed vent? Repeated cycle extensions, hot surfaces around the dryer, lint on the exterior wall, and a damper that barely opens during operation all suggest restricted airflow.
Is it okay to use screws on joints? Screws that protrude into the airflow can snag lint. Pros typically use approved foil tape and mechanical connectors designed for dryer ducts to keep interiors smooth.
Somerville‑specific considerations
Older homes in Somerville may have plaster walls and thicker exterior assemblies that change how openings are cut and sealed. Brick or stone exteriors require masonry tools and careful flashing. In winter, wind exposure on certain streets can push cold air against the termination; the right hood and damper design will reduce drafts without restricting flow. Discuss these details during your site assessment so that the chosen route supports year‑round performance.
Multi‑unit buildings demand coordination with property management to schedule access and ensure that roof penetrations align with community guidelines. Local professionals accustomed to working with associations can help streamline approvals and documentation.
Final thoughts
Finding the right partner for dryer vent installation near me in Somerville is about more than convenience; it is about a durable solution that supports safety, performance, and everyday ease. A well‑planned route using rigid duct, thoughtful terminations, and clean sealing practices transforms the way your laundry room works and feels. With local expertise on your side, you will gain consistent dry times and fewer maintenance surprises.
Ready to improve your home today
Give your laundry room the airflow it deserves. Schedule a visit with a local specialist who will evaluate your space, design an efficient route, and complete the work with meticulous attention to detail. For dependable results and a smoother laundry routine, book professional dryer vent installation and enjoy safe, efficient drying in every season.
