
Introduction
Learning how to do dryer vent cleaning in Somerville, New Jersey is one of the most practical steps you can take to protect your home, your appliances, and your family’s safety. Between seasonal humidity, winter cold snaps, and older housing stock mixed with new construction, lint accumulation can happen faster than most people realize. When lint lines the inside of the vent, the dryer struggles to push out warm, moist air, which leads to longer drying times, overheating, and an increased risk of ignition. This guide will walk you through a careful, step-by-step process for cleaning, maintaining, and inspecting the entire vent pathway. If at any point you decide professional help is a better fit, consider scheduling trusted dryer vent cleaning so the job is done thoroughly and safely.
Every home in Somerville is a little different. Some are multi-level colonials with basements, others are townhomes or condos with the dryer located on an interior wall or upper floor, and many have longer vent runs that travel through ceilings and joist spaces before exiting outside. Regardless of your layout, the objective remains the same: remove lint from the lint screen housing, transition duct, and main vent duct all the way to the exterior hood. Doing this carefully once or twice per year—more often if you do frequent laundry, have a large household, or shed pet hair—will keep your dryer running efficiently and decrease the chance of problems.
Why Dryer Vent Cleaning Matters
A clothes dryer is essentially a powerful air mover paired with heat. Airflow is everything. When the vent is clear, the dryer moves moisture out of the drum quickly, and clothes dry in a single cycle. When lint layers the duct walls, airflow collapses. The dryer compensates by running longer and hotter, which can damage fabrics, wear out internal components, and cause the thermal fuse or high-limit thermostat to trip. In severe cases, trapped lint can ignite. Keeping the vent clean restores proper airflow, reduces energy waste, and prolongs appliance life.
Somerville’s climate adds another factor: variable humidity. Moist air in summer months, combined with frequent laundering of towels and athletic gear, can increase lint adhesion inside the duct. Winter brings colder exhaust temperatures at the exterior hood, which may encourage condensation and lint clumping near the outlet. These seasonal cycles make a regular cleaning routine essential rather than optional.
Know Your Dryer Vent Path
Before you begin, map the route. Find where the dryer connects to the transition duct (flexible or semi-rigid metal tubing), where that duct connects to the wall or floor collar, and where the main duct travels to the exterior hood. Some homes have a short, straight path; others have multiple elbows. The more bends in the run, the greater the resistance and the more likely lint will accumulate at those turns. If your vent is unusually long, cleaning becomes more critical because airflow is naturally lower.
It is also important to identify the duct materials. Rigid metal ducting is preferred and safest. If you find thin plastic or foil flex duct in the main vent run, plan to replace it with rigid or semi-rigid metal. Plastic or thin foil flex can trap lint in ridges, crush easily, and is not recommended by manufacturers or safety organizations. The short transition from the dryer to the wall can be semi-rigid metal for flexibility, but it should be as short and straight as possible.
Preparation and Safety
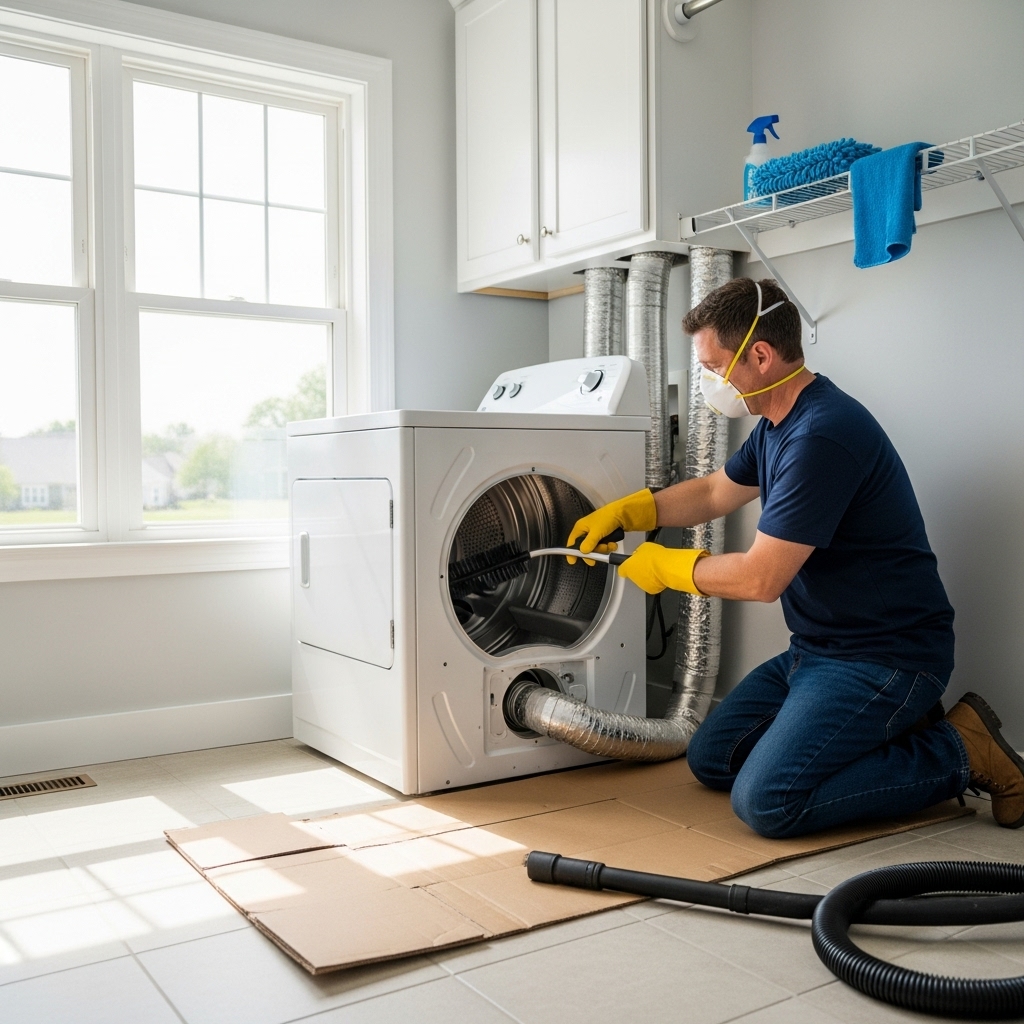
Unplug the dryer from the electrical outlet. If you have a gas dryer, close the gas shutoff valve located on the gas supply line before moving the appliance. Protect the floor with a piece of cardboard or a furniture slider to make moving the dryer easier and to avoid scratching hardwood or tile. Have a flashlight ready to inspect the area behind the dryer and the wall connection.
Gather your tools: a long vent brush kit designed for dryer ducts, a vacuum with a hose attachment, microfiber cloths, and a screwdriver or nut driver if clamps need loosening. Wear a dust mask and eye protection if you are sensitive to dust. Keep a trash bag nearby to collect lint as you work. If you’ll be accessing an exterior hood, ensure you have a stable step ladder if needed and that the area is clear of shrubs or obstacles.
Step 1: Clean the Lint Screen and Housing
Open the lint screen compartment and remove the screen. Wash it gently with warm water and a mild dish soap to remove invisible fabric softener residue that can restrict airflow through the mesh. Dry it completely. While the screen dries, use your vacuum hose to reach into the lint screen housing and remove lint clumps that fall below the filter. A flexible crevice tool can help. This area is frequently overlooked, yet it is often the first place where airflow is restricted.
If your lint screen is on top of the dryer, there is usually a deep chute directly into the internal blower housing. Work slowly and avoid dropping tools. If your lint screen is inside the door opening, the housing will be just below the door frame and usually easier to access with the vacuum hose and a narrow brush.
Step 2: Disconnect and Inspect the Transition Duct
Carefully pull the dryer away from the wall just enough to access the transition duct. Loosen the worm-gear clamps at both ends and remove the duct. Inspect the inside of the transition duct with a flashlight. If the duct is crushed, kinked, or full of ridges that trap lint, replace it with a semi-rigid metal model cut to the appropriate length. Clean the interior of the duct using your vent brush and vacuum until shiny metal is visible.
Inspect the wall collar where the transition duct connects. Lint often accumulates right at this junction because it is the first turn out of the dryer. Use the brush to agitate debris and the vacuum to capture it. Wipe the collar and surrounding area with a damp cloth to remove fine dust. A tight, clean connection here sets the stage for good airflow once you reassemble.
Step 3: Brush the Main Vent Run
Attach the dryer vent brush to its flexible rods, adding sections until the brush can reach the entire length of the vent to the exterior hood. Depending on your home, you may prefer to brush from the interior wall toward the outside, from the exterior hood inward, or both. Many homeowners find the most effective method is to disconnect the exterior hood temporarily and brush in both directions to ensure complete removal of lint.
Insert the brush gently and rotate it as you push forward. Advance about a foot at a time, then retract and vacuum out dislodged lint. Continue until you reach the exterior end. If you meet resistance, you may have reached an elbow. Rotate more carefully and work through the bend without forcing the rods to avoid breaking a joint. If you cannot navigate a tight turn, brush from the exterior side to meet in the middle.
Step 4: Clean the Exterior Vent Hood
Outside, inspect the hood or louvered cover. It should open freely when air blows out and close when not in use. Remove the cover if possible and brush any lint from the interior cavity. If the damper flap or louvers are broken or stuck due to weathering, replace the hood with a model that includes a backdraft damper that opens easily. Check for signs of birds nesting or rodent intrusion; a pest screen may be appropriate, but it must never restrict airflow or become a lint trap. If you use a screen, clean it frequently.
While outside, look for signs of moisture staining on the siding near the hood or lint deposits on nearby surfaces. Both can indicate that the vent has been leaking moist air or that the damper is not sealing well. After your cleaning, these signs should diminish as airflow improves and the damper operates correctly.
Step 5: Reassemble and Test
Reattach the transition duct with new or reconditioned clamps. Ensure the duct is fully seated on the collars and that clamps are snug but not overtightened. Slide the dryer back into position carefully, maintaining a gentle sweep in the transition duct with no kinks. Plug in the dryer, and if applicable, reopen the gas valve. Run the dryer on an air-only or low-heat setting for several minutes and check the exterior hood: the damper should open fully and the exhaust should feel strong and steady.
Back inside, listen for unusual vibrations or rattles. A noisy, rattling duct can indicate a loose clamp or a misaligned section. If the dryer’s control panel displays any airflow or vent warnings, repeat your inspection and ensure the duct path is truly clear. Many modern dryers monitor exhaust temperature rise and will alert you if flow remains restricted.
Local Considerations for Somerville Homes
In Somerville, some homes route the vent through basements and up through rim joists; others vent to the roof from upper floors. Vertical vents can be more challenging because gravity encourages lint to settle on elbows. If your home vents to the roof, be particularly diligent about brushing from both ends and ensure roof work is approached cautiously and safely. For multi-family buildings or townhomes, confirm that the vent you are cleaning serves only your unit and that you are permitted to access the exterior termination.
Older homes may have legacy duct materials or long runs that were acceptable decades ago but are suboptimal today. If your cleaning reveals excessive elbows or long routes, consider consulting a professional to shorten or straighten the path where feasible. Improved routing can pay dividends in shorter dry times and safer operation.
When to Call a Professional
DIY cleaning is effective for many households, but there are times when calling in a specialist is the best choice. If your vent run is lengthy with multiple concealed elbows, if the dryer repeatedly shuts off due to overheating, or if you find signs of water accumulation or severe lint compaction, a professional has the equipment to resolve it quickly. High-powered vacuums, rotary brush systems with torque control, and airflow measurement tools can identify and fix problems you cannot easily reach. Mid-rise and high roof terminations can also require specialized access. In these situations, scheduling experienced dryer vent cleaning can save time and provide peace of mind.
Another reason to consider expert help is after a renovation. Construction dust and drywall powder can combine with lint to form stubborn deposits that ordinary brushes may smear rather than remove. Post-renovation cleanings restore a healthy baseline so you can resume a normal maintenance schedule.
Troubleshooting Common Issues
If clothes still take too long to dry after cleaning, verify that the lint screen is fully dry and properly seated, as a damp or misaligned screen can reduce airflow. Inspect the transition duct for hidden kinks after you move the dryer back. Sometimes the dryer feet rest on the duct if it is too long or routed poorly. Shorten the duct and reposition the dryer to relieve pressure.
Persistent moisture in the laundry room or condensation around the exterior hood can signal a partially blocked vent or a damper that is not closing. Confirm that the vent hood opens fully during operation and closes afterward. Replace weathered hoods that stick. If you notice a burning smell, stop the dryer immediately, unplug it, and recheck for lint accumulation near the heating element area, in the lint screen housing, and at the first elbow in the duct path.
Maintenance Frequency and Best Practices
For a typical household in Somerville, plan to clean the dryer vent at least annually. Households that run multiple loads per week, use high-lint fabrics, or have pets that shed should consider a semiannual schedule. In between full cleanings, empty the lint screen before every load, avoid overloading the dryer, and use the shortest possible cycle that gets clothes dry. Overdrying produces more lint by wearing fabric fibers unnecessarily.
When washing, avoid excessive use of fabric softeners that can coat the lint screen and reduce efficiency. Periodically wash the lint screen to remove residues. Keep the area around the dryer tidy and free of storage that could press against the duct or block airflow around the appliance. If your laundry space is small, consider installing a recessed dryer box to give the transition duct room to curve without kinking.
Improving Vent Routing
If your vent has multiple tight elbows, each bend adds resistance. Where practical, replace sharp elbows with long-turn elbows and shorten the overall run. Use rigid metal duct for the main run, secured with foil tape on the joints rather than screws that penetrate into the airstream and catch lint. If you uncover screws protruding into the duct, remove them, switch to smooth joints, and seal from the outside with appropriate foil tape rated for HVAC use.
Exterior vent placement matters too. The termination should be at least several inches above grade to avoid snow blockage in winter and far enough from doors or windows to keep moist air from reentering the house. Keep landscaping trimmed so shrubs do not obstruct the hood. A clear exit ensures the airflow you worked to restore is not impeded.
Energy and Appliance Longevity Benefits
Restored airflow means shorter cycles and less strain on heating elements, motors, and bearings. Over time, that reduces wear and the likelihood of premature failure. Many homeowners notice that after a thorough vent cleaning, clothes feel warmer and drier at the end of a cycle without needing extra time, and laundry rooms feel less humid. These small signs add up to meaningful savings in energy and maintenance.
From an environmental standpoint, efficient drying means fewer kilowatt-hours or fewer cubic feet of gas consumed. While a single load may not seem like much, cumulative savings across a year of laundry are significant, especially for active families.
Safety Checks After Cleaning
With the dryer running, step outside and verify that the damper is fully open and that the exhaust has a steady, forceful flow. Place your hand near the outlet—without covering it—and feel for a consistent warm breeze during a heated cycle. Intermittent airflow can indicate a partially blocked path or a collapsing section in the transition duct. Back inside, check that the dryer cabinet remains comfortably warm but not hot to the touch. Excessive heat may suggest restricted airflow inside the appliance.
Finally, confirm that the laundry area smoke alarm, if present, has a fresh battery and that a small fire extinguisher is stored nearby. While a properly cleaned vent reduces the likelihood of an emergency, preparedness is always wise.
FAQ
How often should a Somerville homeowner clean the dryer vent? For light use, once a year is a reasonable baseline; for heavy use, aim for every six months. Monitor dry times and heat levels—longer cycles or a hotter-than-usual dryer indicate it’s time to clean.
Can I use a shop vacuum alone to clean the vent? A vacuum helps, especially at the lint screen housing and wall collar, but a long vent brush is typically needed to reach deeper into the duct and dislodge lint adhered to the walls, particularly at elbows.
Is it okay to use a leaf blower to clear the vent? Blowing air through the vent can move lint, but it may also push debris into places you do not want it, cause clogs at the exterior hood, or detach weak connections. Brushing plus controlled vacuuming is more thorough.
What if my vent terminates on the roof? Roof terminations are more complex. Ensure safe access, or consider hiring a professional who can clean from inside and outside with proper safety gear and tools designed for vertical runs.
Why does my dryer still overheat after cleaning? Check for a crushed transition duct, a stuck exterior damper, or a lint screen coated with softener residue. Also, confirm that the interior of the dryer cabinet is free of lint; internal cleaning may be required.
Can birds or rodents enter the vent? Yes. Damaged or missing dampers can invite pests, and nesting material is highly flammable. Inspect the hood periodically and replace broken covers immediately. Use appropriate screens that do not impede airflow and keep them clean.
Do I need to replace foil or plastic ducts? The main vent run should be rigid metal. Replace flimsy foil or plastic with rigid or semi-rigid metal to reduce friction, prevent crushing, and minimize lint accumulation.
How do I know the job was successful? Clothes should dry faster, the exterior damper should open fully during operation, and the dryer cabinet should not feel excessively hot. If symptoms persist, reassess the vent path for hidden elbows or obstructions.
Schedule Reliable Dryer Vent Service in Somerville
If you are short on time, have a complex vent path, or simply want professional verification that every inch of the duct is clear, local specialists can provide a thorough solution. For dependable results and safer, more efficient laundry days, book professional dryer vent cleaning and enjoy the confidence that your system is operating as it should.
